

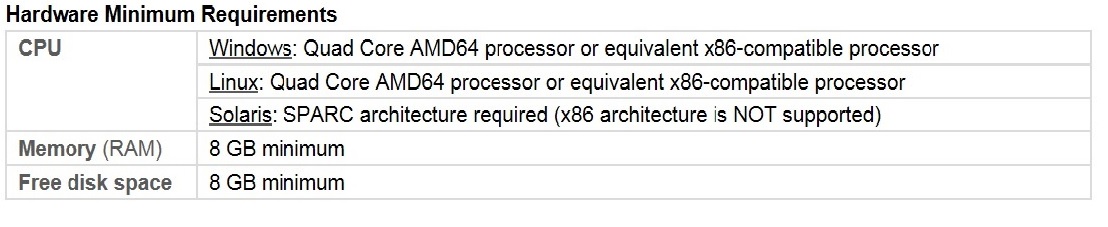
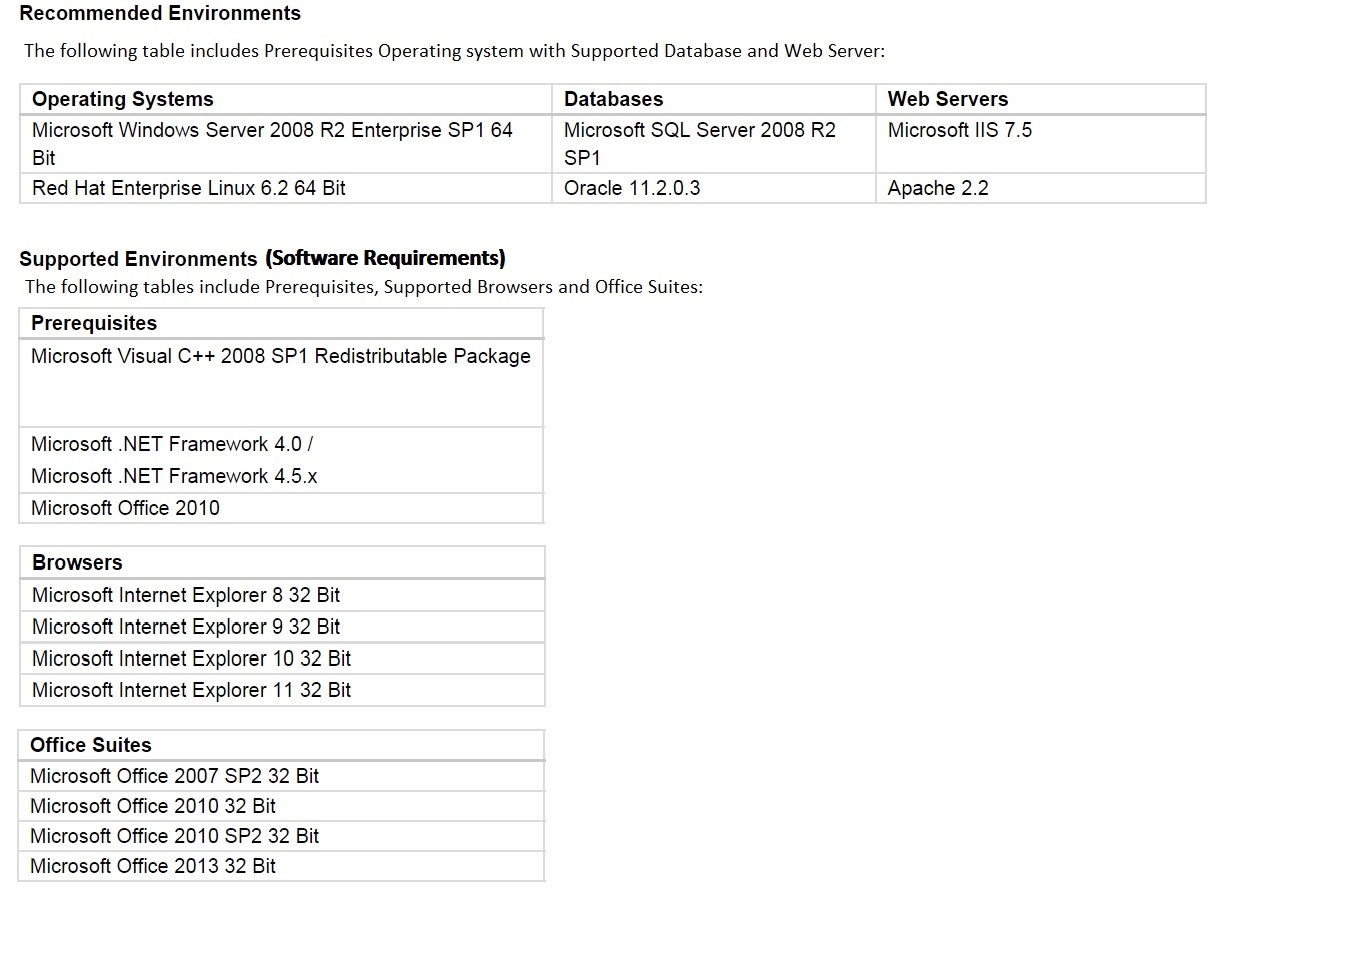
1. Server-Side System Requirements
The following are the server-side system requirements and configurations for installing HP ALM 11.52 on Windows, Linux and Solaris: |
2. Download Operating system and install it
(Microsoft Windows Server 2008 R2 Enterprise SP1 64 Bit)
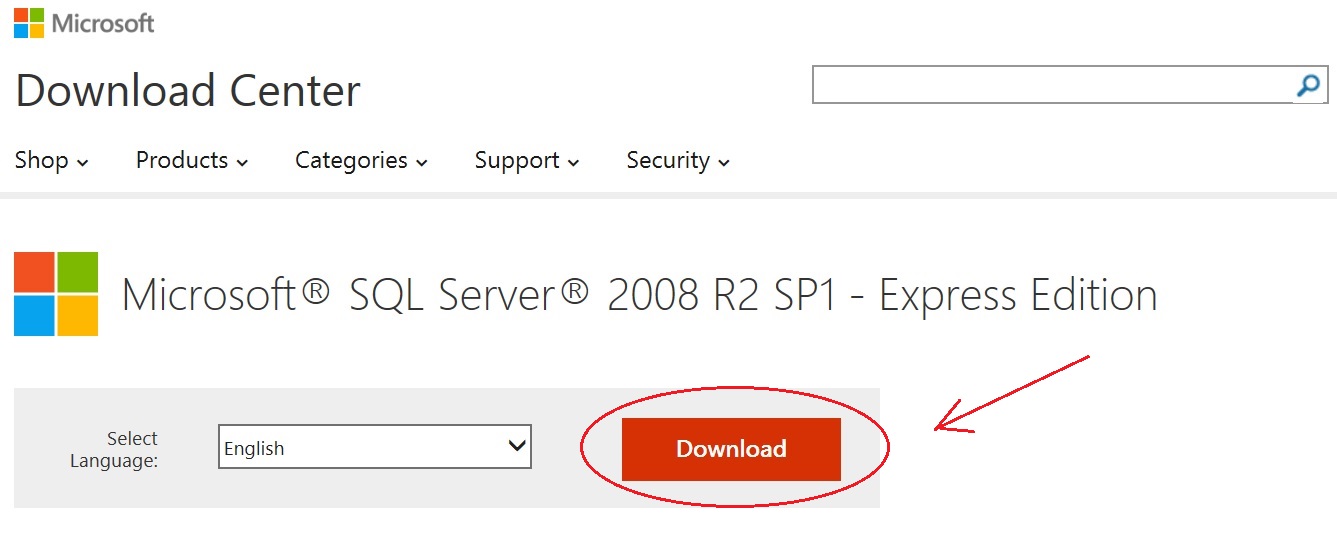
3. Download Database (Microsoft SQL Server 2008 R2 SP1)
3.1 Download link
http://www.microsoft.com/en-in/download/details.aspx?id=26729
3.2 Click Download Button as marked below
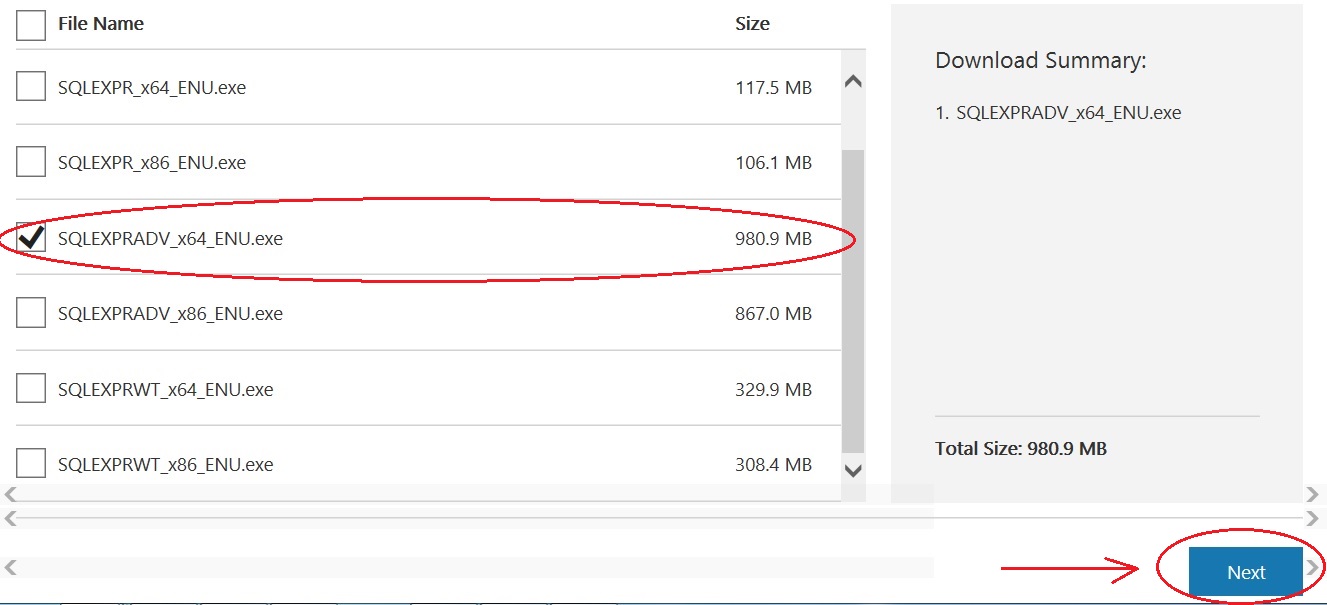
3.3 Select the .exe file of 980.9MB as mentioned below and click “Next” and download it
4. Steps to Install Database
https://www.realsenseconsulting.com/microsoft-sql-server-2008r2-sp1-step-by-step-installation/
5. Download Webserver (IIS7.5)
5.1 Download link
http://www.microsoft.com/en-us/download/details.aspx?id=1038
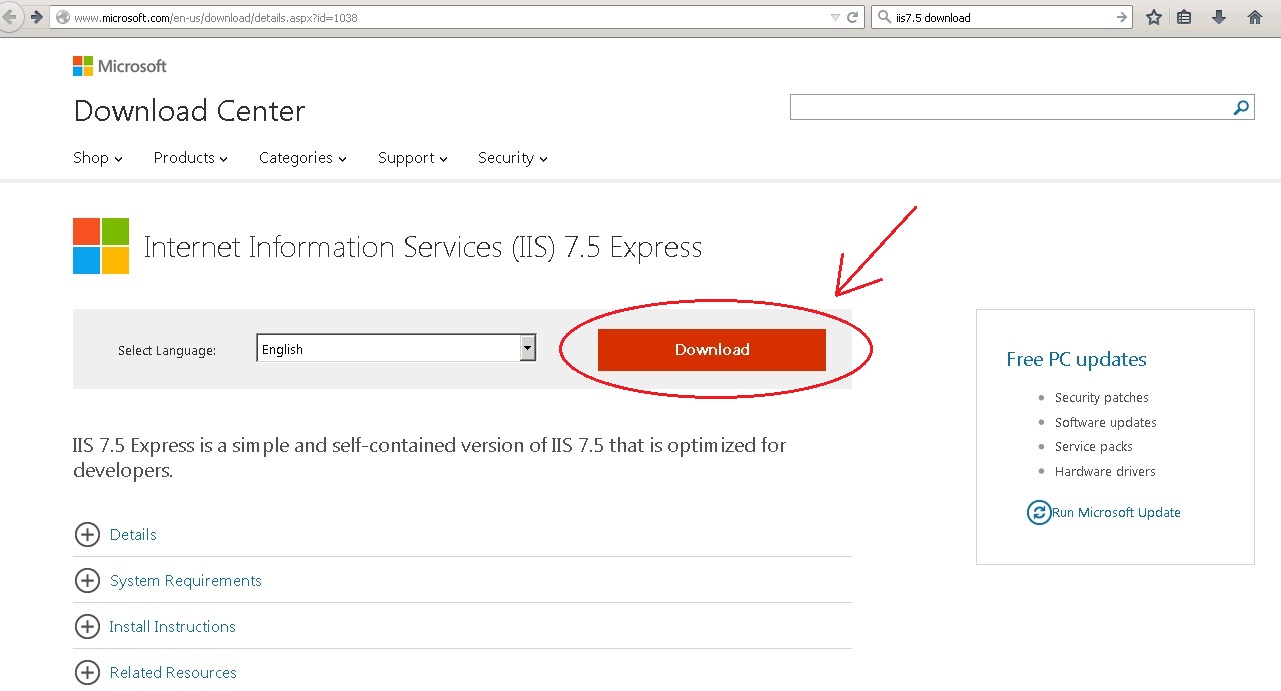
5.2 CLICK on “Download” as marked below
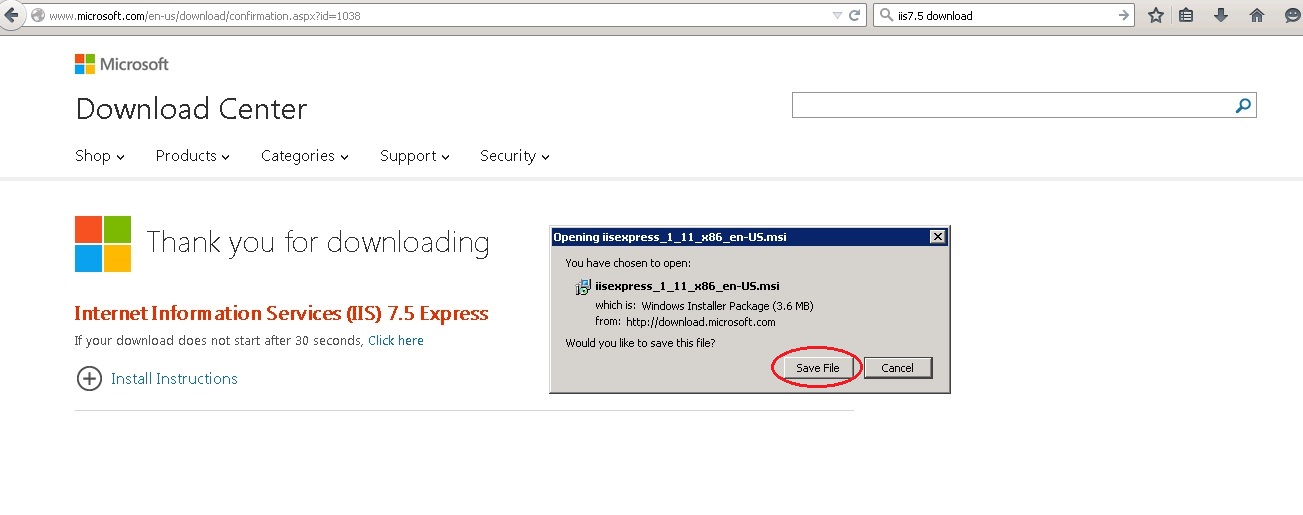
5.3 A download link appears simply “Save File” and you will get the Web Server
6. Steps to Install Web Server
https://www.realsenseconsulting.com/iis7-5-web-server-step-by-step-installation/
7. Steps to Download HP ALM 11.52 trial version
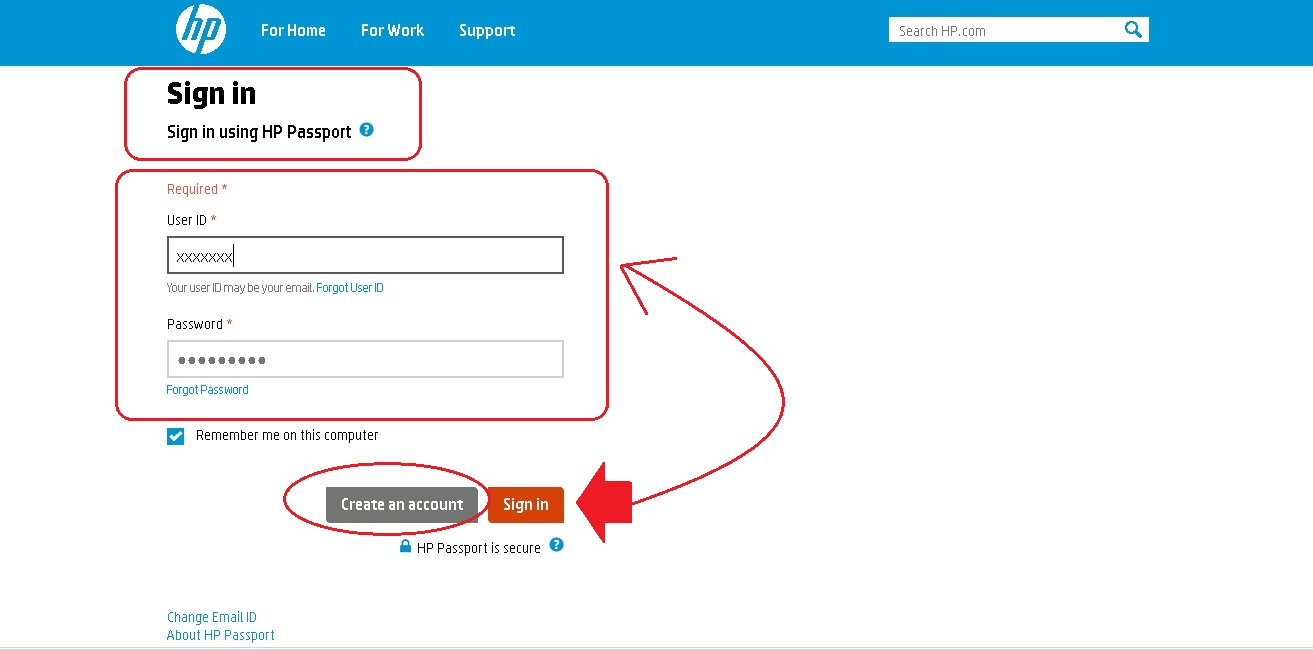
7.1 You need to make an account in HP website, refer to this link
https://passport2.hp.com/hppcf/login.do?hpappid=PDAPI_USB_PRO2
7.2 Create an account then Sign in
7.3 Now to download the trial versions of HP QC you need to have a Unique SAID number which you can only get from an HP employee, and after getting it you need to login in the HP Passport account and Go to (My Software Updates)-Enter your SAID number-Accept the terms and conditions then CLICK “View available products”
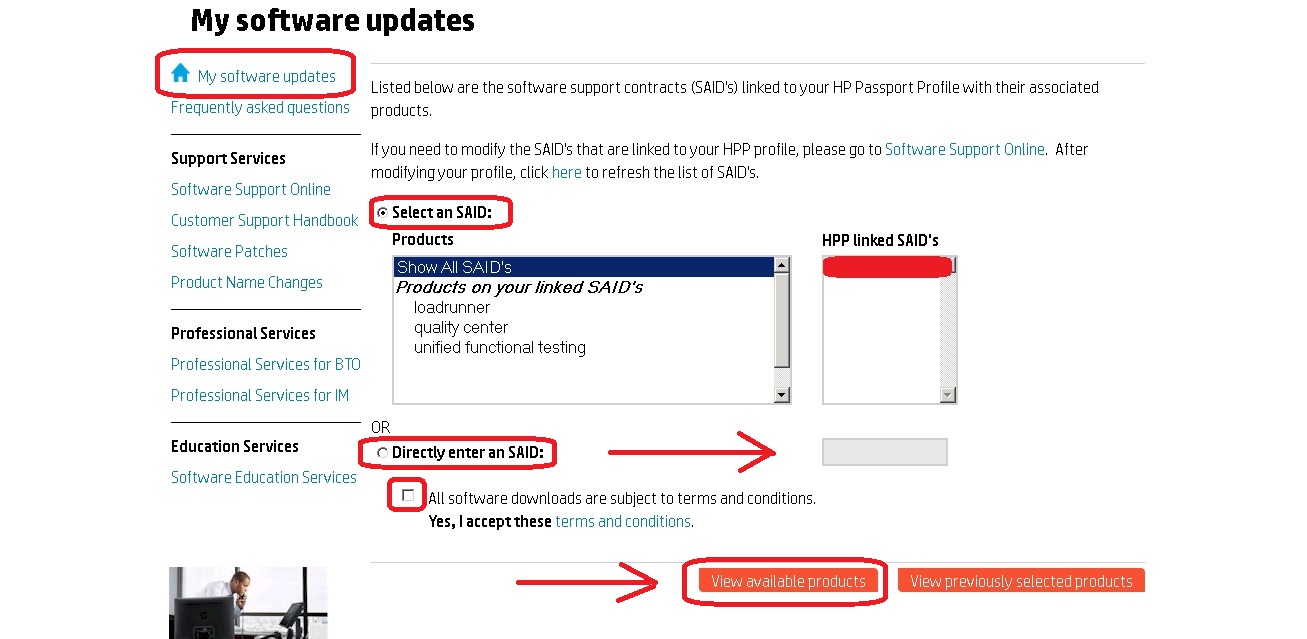
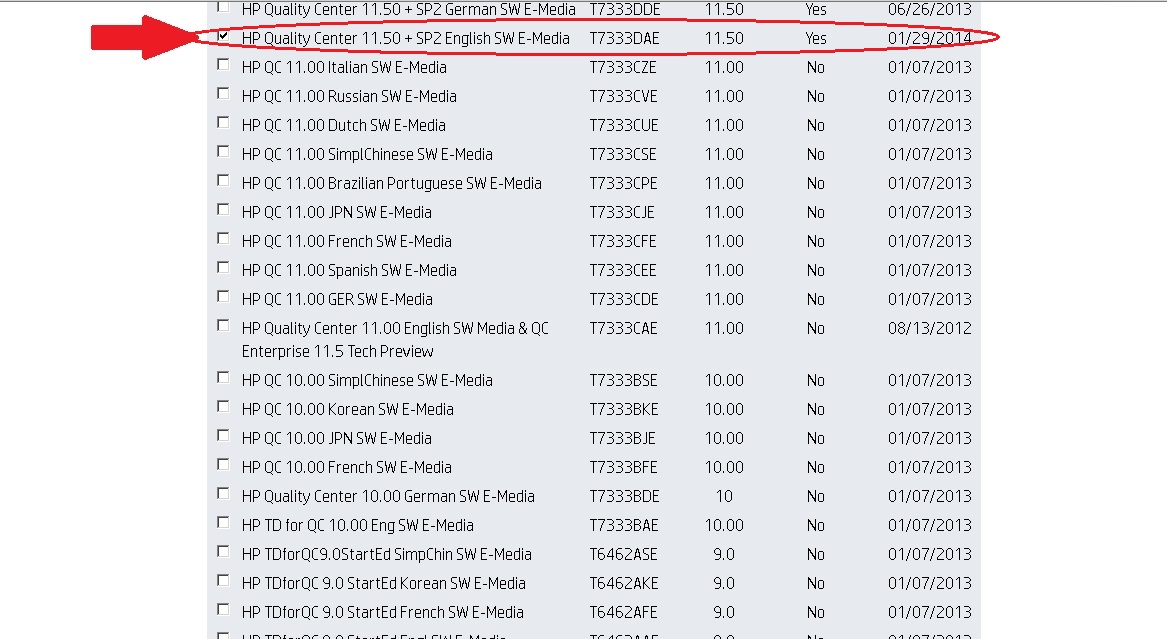
7.4 Now in the ALM tab, select the desired Version in accordance with the comfortable language then scroll down
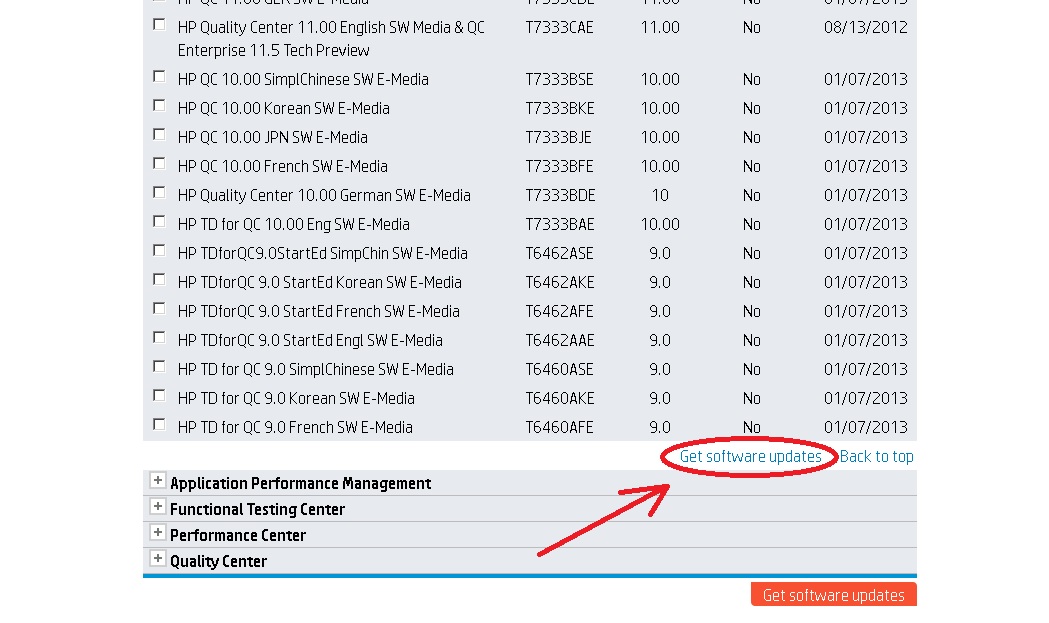
7.5 Now you have to CLICK on “Get software updates”
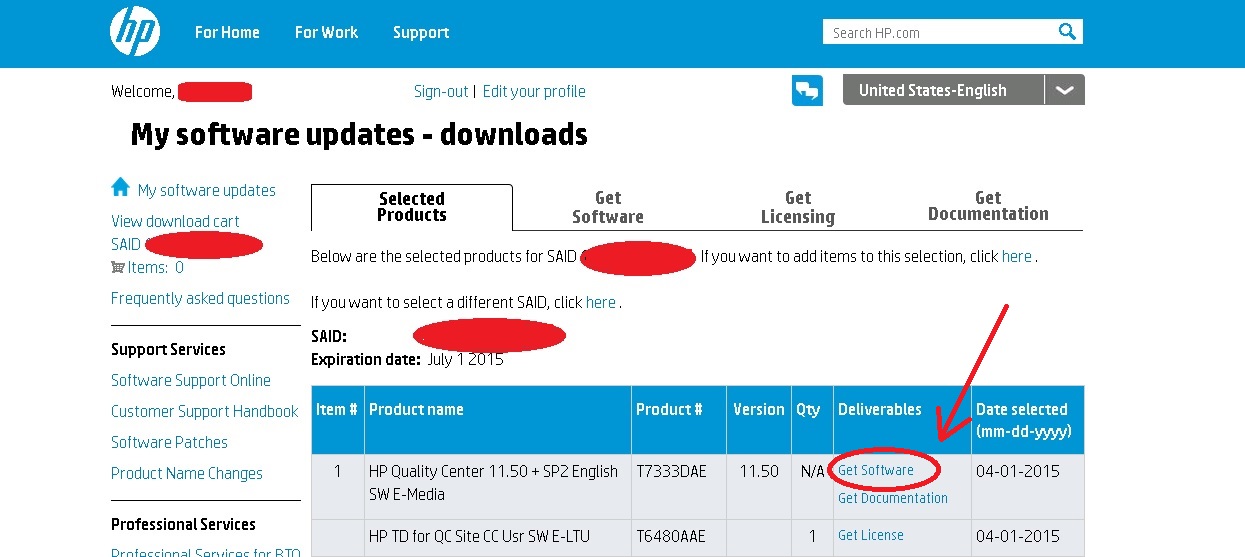
7.6 CLICK on “Get Software” as mentioned below
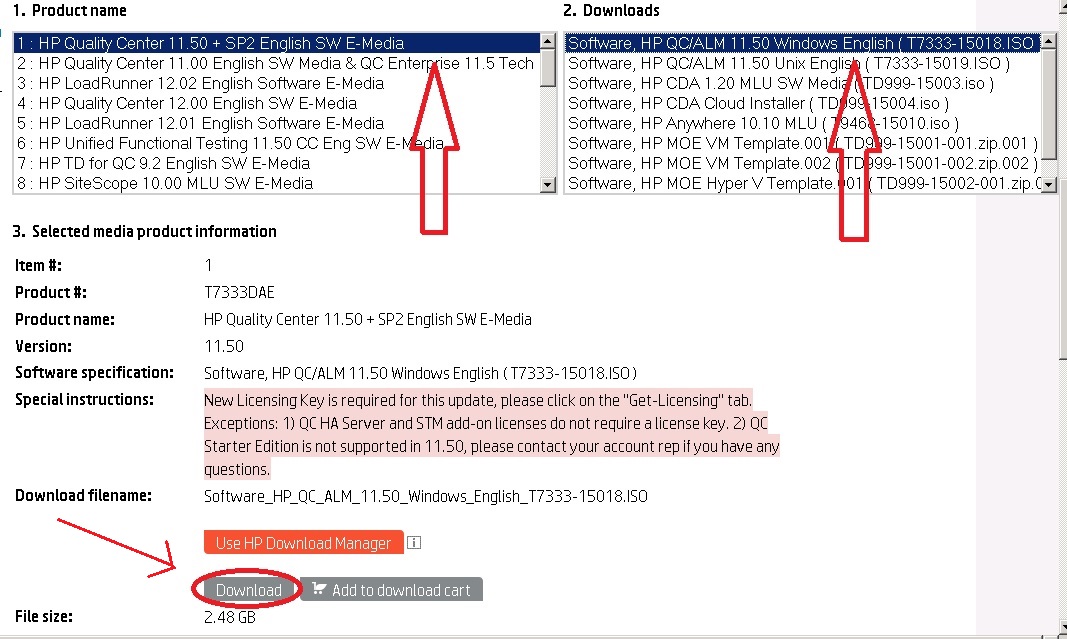
7.7 In the left hand side SELECT the Product name and in the right hand side SELECT the correct Download File and then CLICK on “Download” as marked below
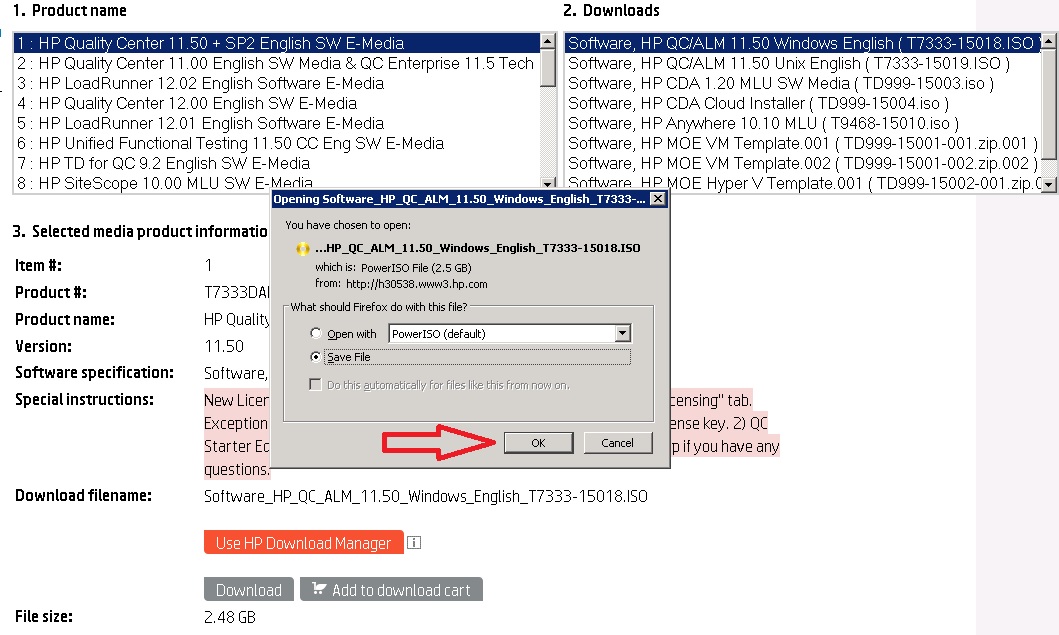
7.8 Automatically the Download link will pop up and will ask you to save the file, CLICK “Ok” and save your file accordingly
8. Steps to Install & Configure HP ALM 11.52
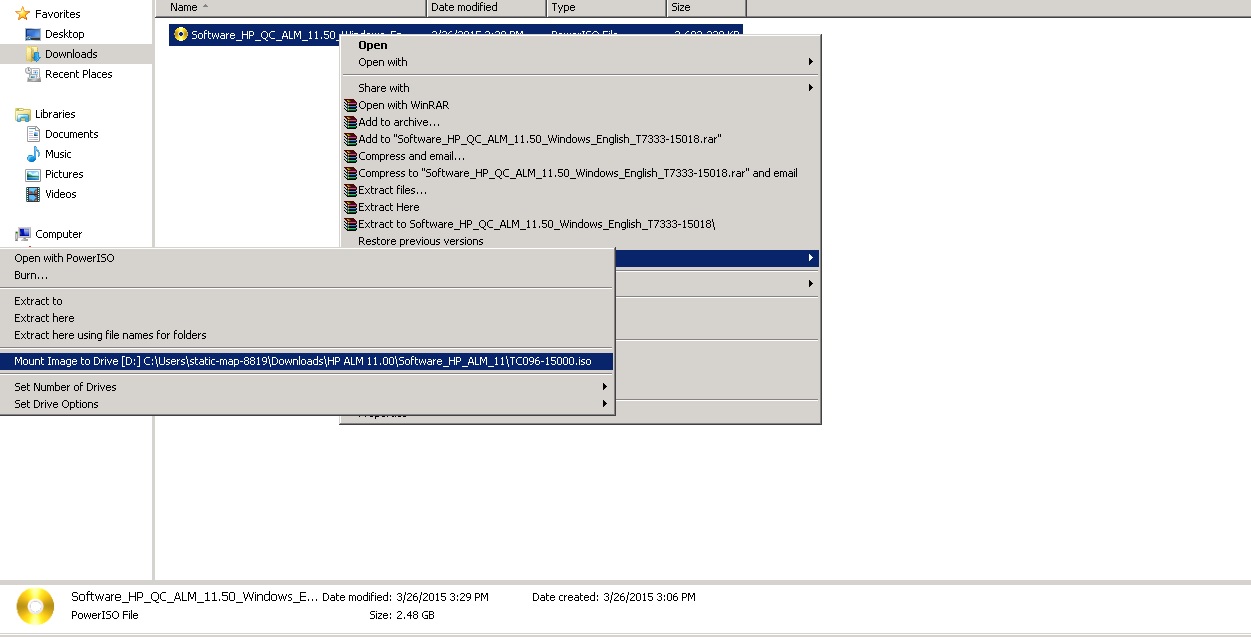
8.1 Go to the Download path, as this is an .iso file you need to have (Power ISO) install it then right click the iso file-power iso- select Mount image to Drive as mentioned below
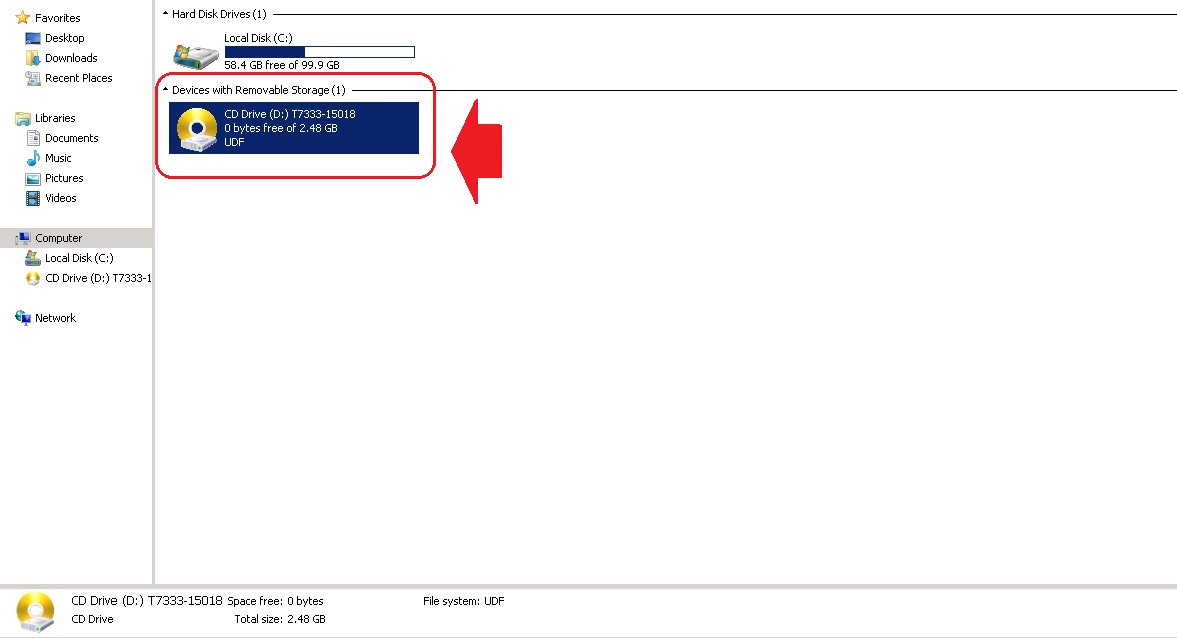
8.2 Go to My Computer and you will see the ISO file in CD Drive (D:) which is of 2.48 GB
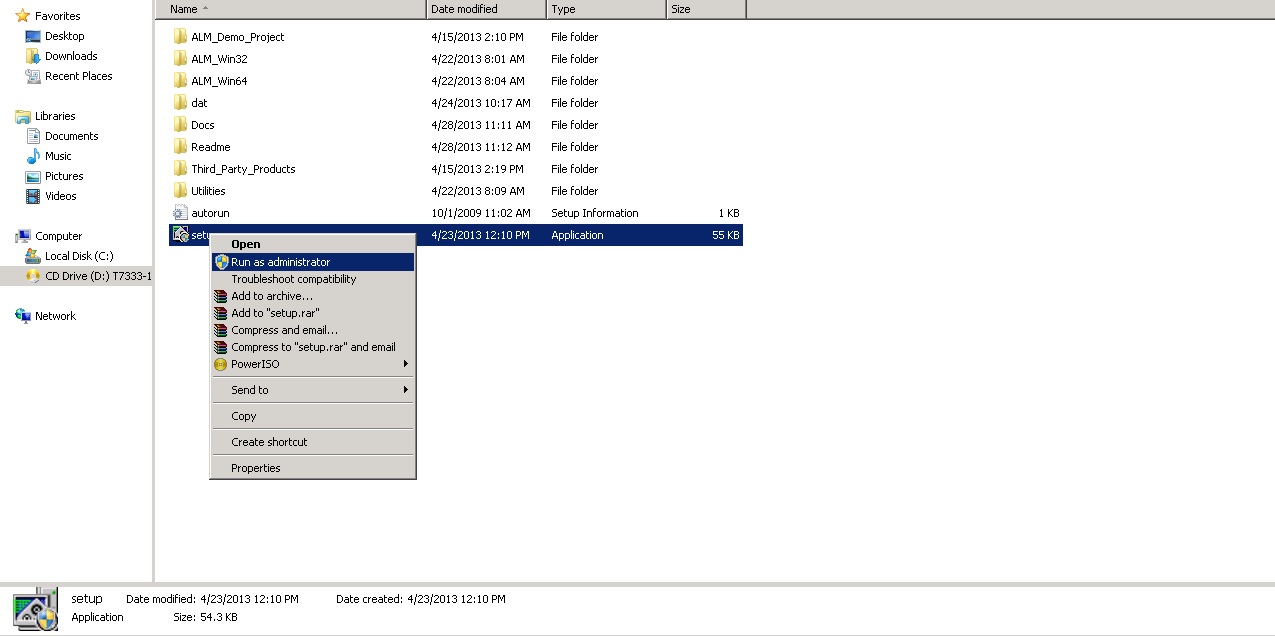
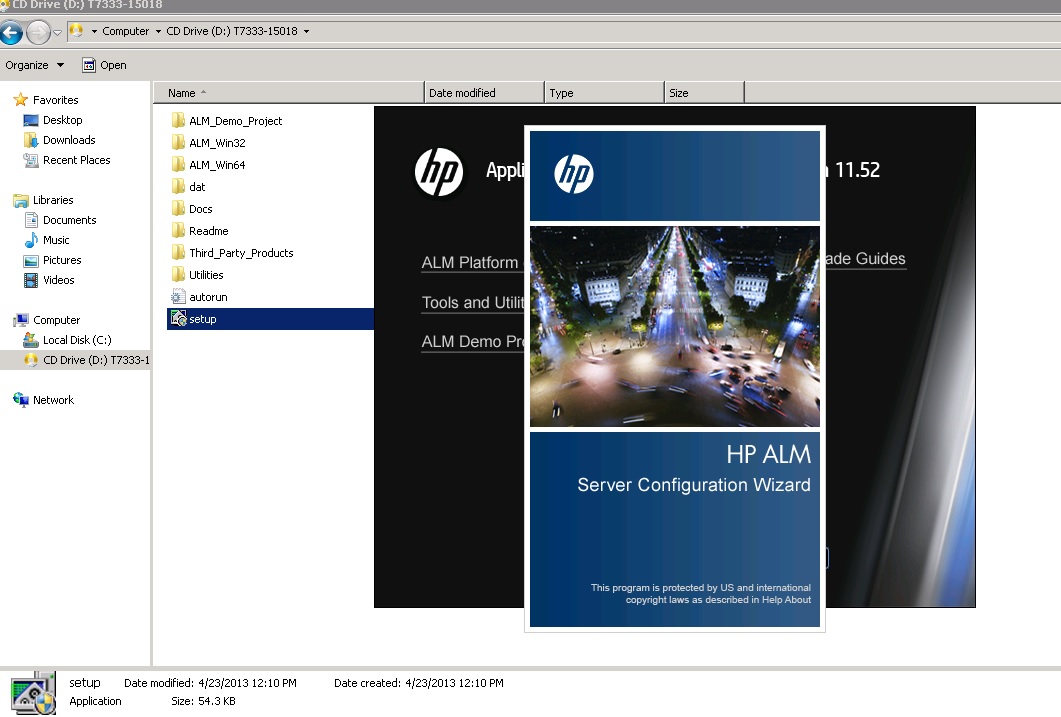
8.3 Open this Drive and Run the Setup as Administrator
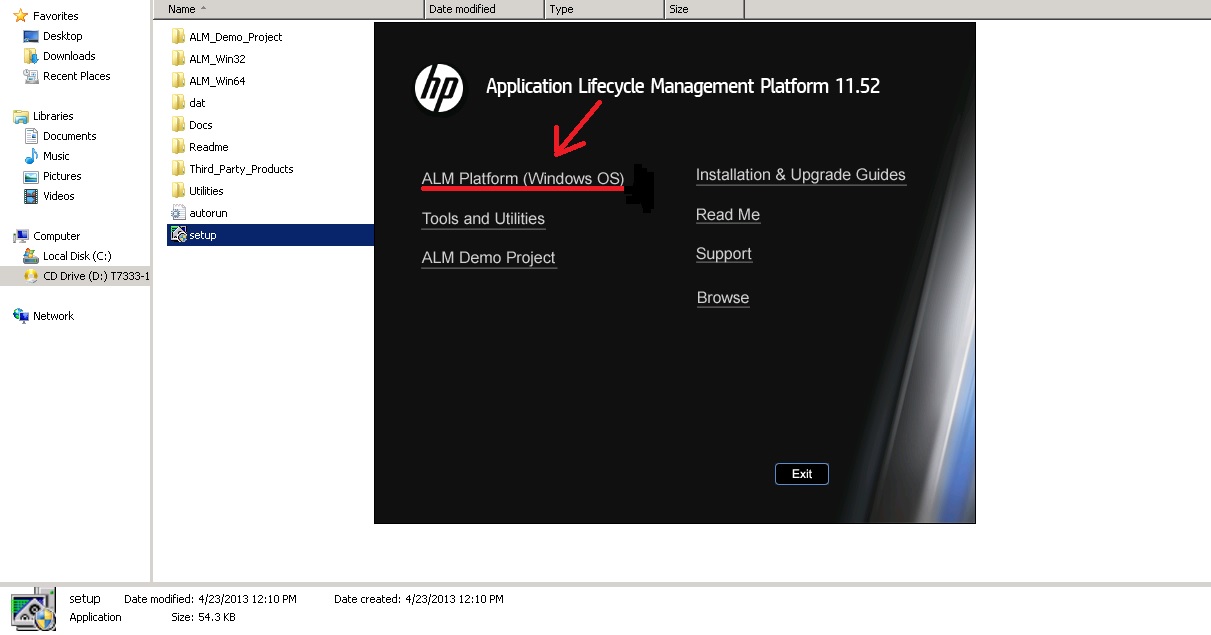
8.4 ALM Platform 11.52 window will appears, you need to Select ALM Platform (Windows OS)
8.5 Welcome to HP ALM 11.52 Installer now CLICK “Next”

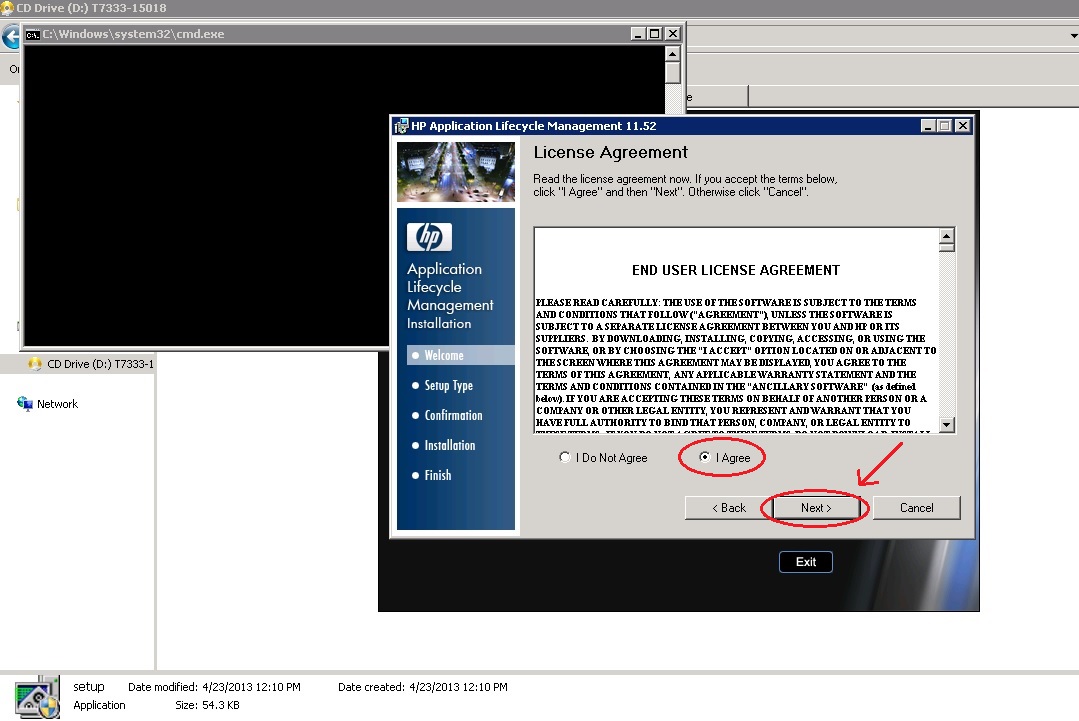
8.6 Agree the License Agreement and CLICK “Next”
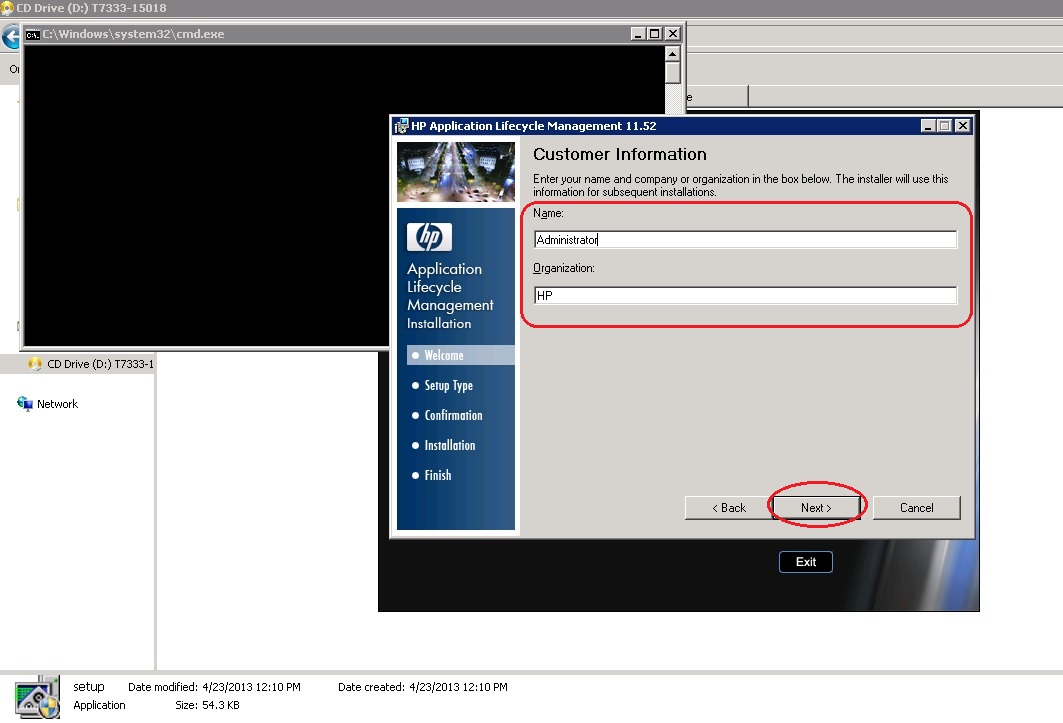
8.7 In Customer Information Enter your Name and Organization and CLICK “Next”
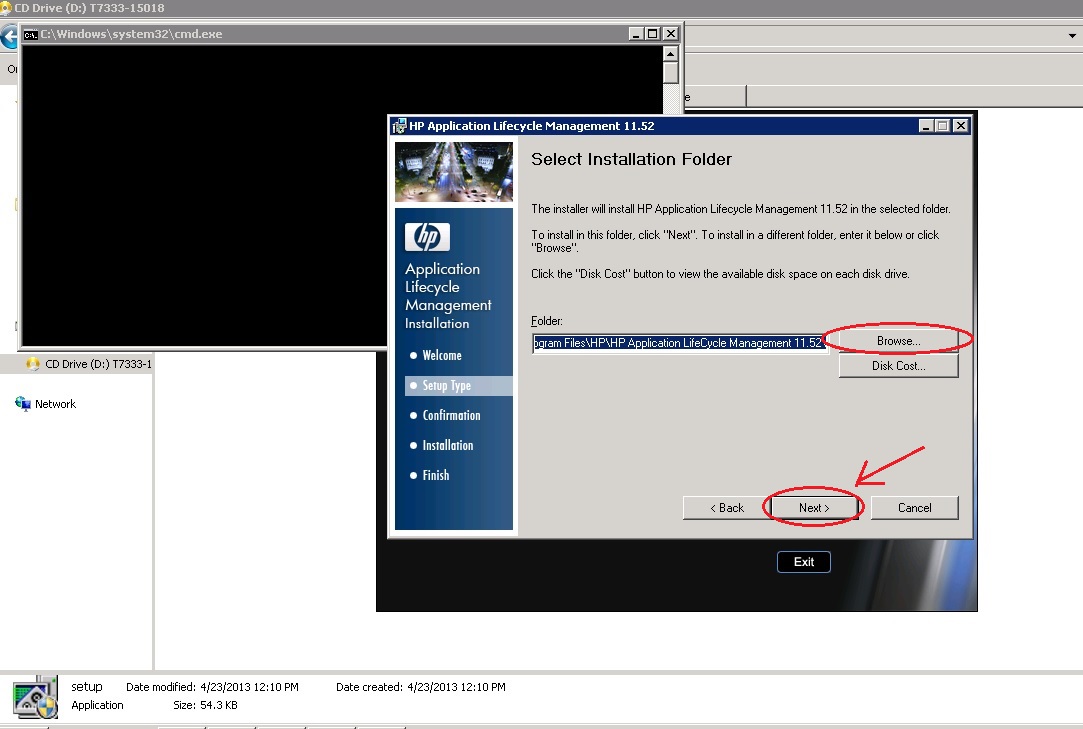
8.8 Select the Installation Folder from “Browse” and CLICK “Next”
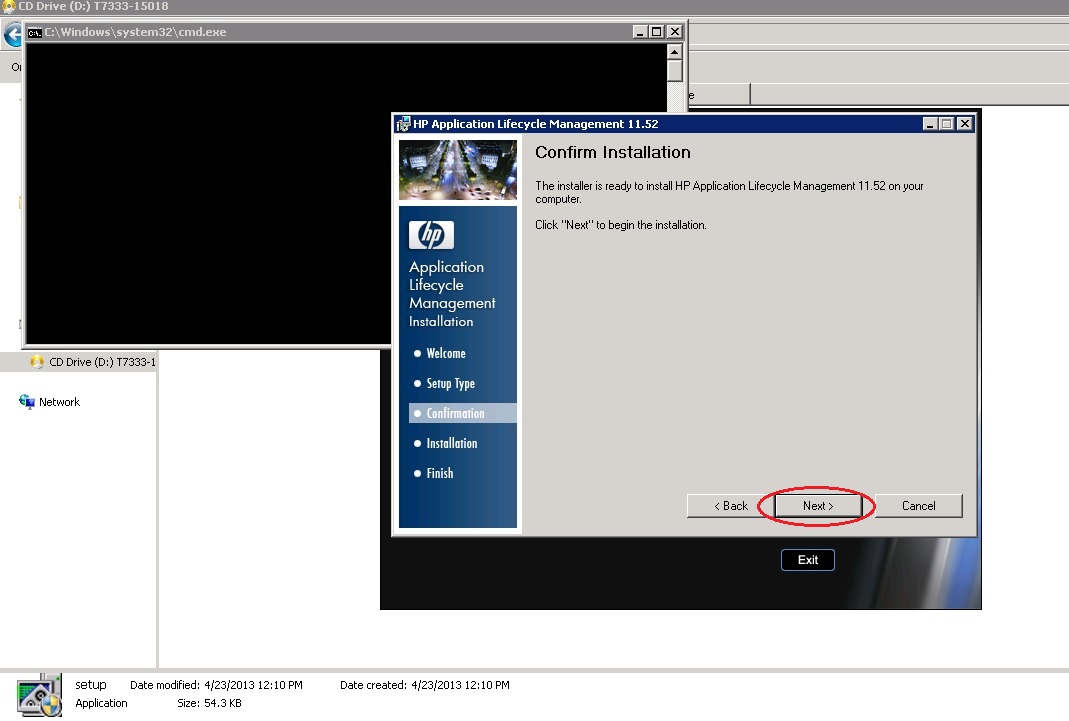
8.9 Confirm the Installation and CLICK “Next”
8.10 Now Wait for the Installation

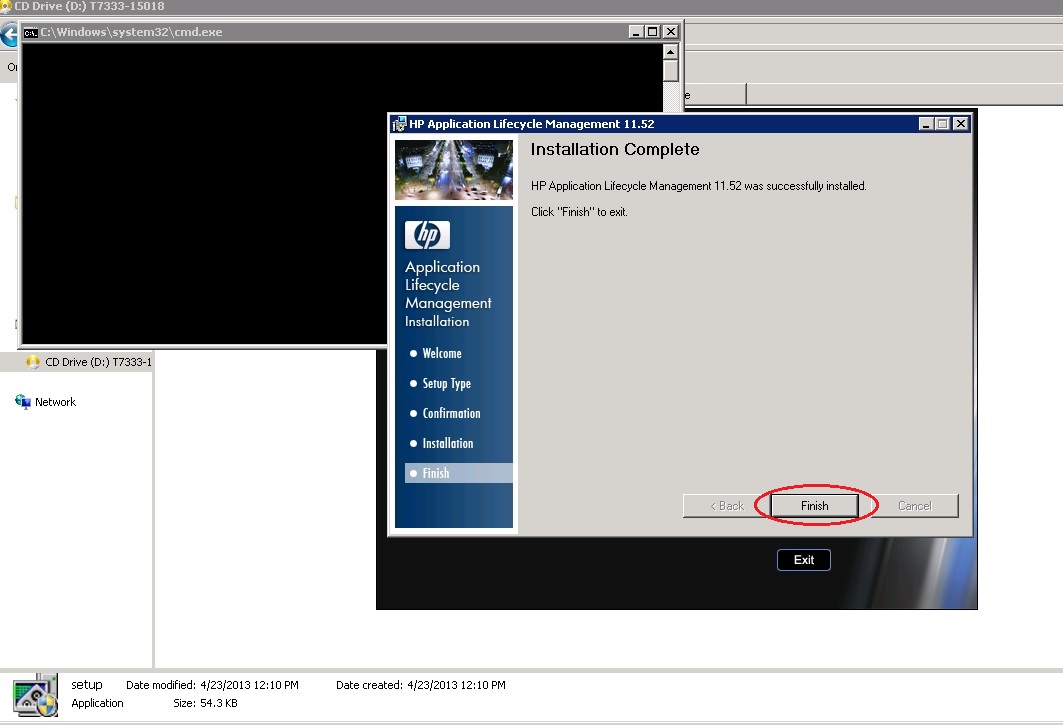
8.11 Installation is Completed Successfully now CLICK “Finish”
8.12 Now automatically HP ALM Server Configuration Wizard will Pop up
8.13 Welcome to HP Server Configuration Wizard and CLICK “Next”

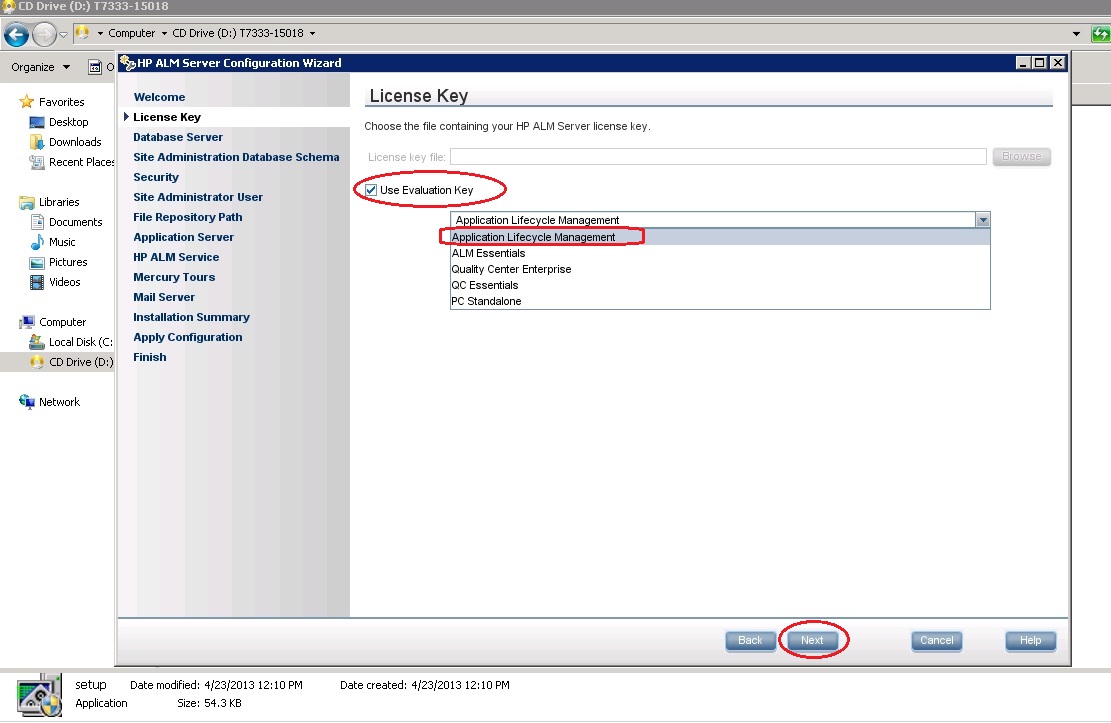
8.14 Use Evaluation License Key and Select Application Lifecycle Management and CLICK “Next”
9. Steps to integrate Database with HP ALM 11.52
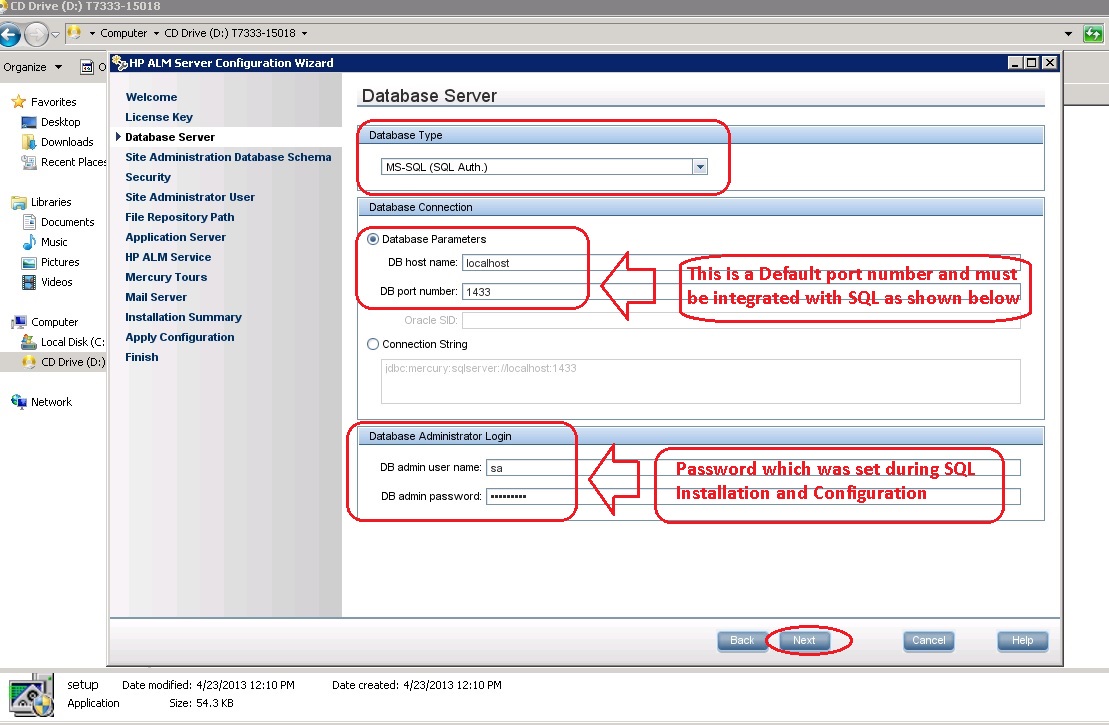
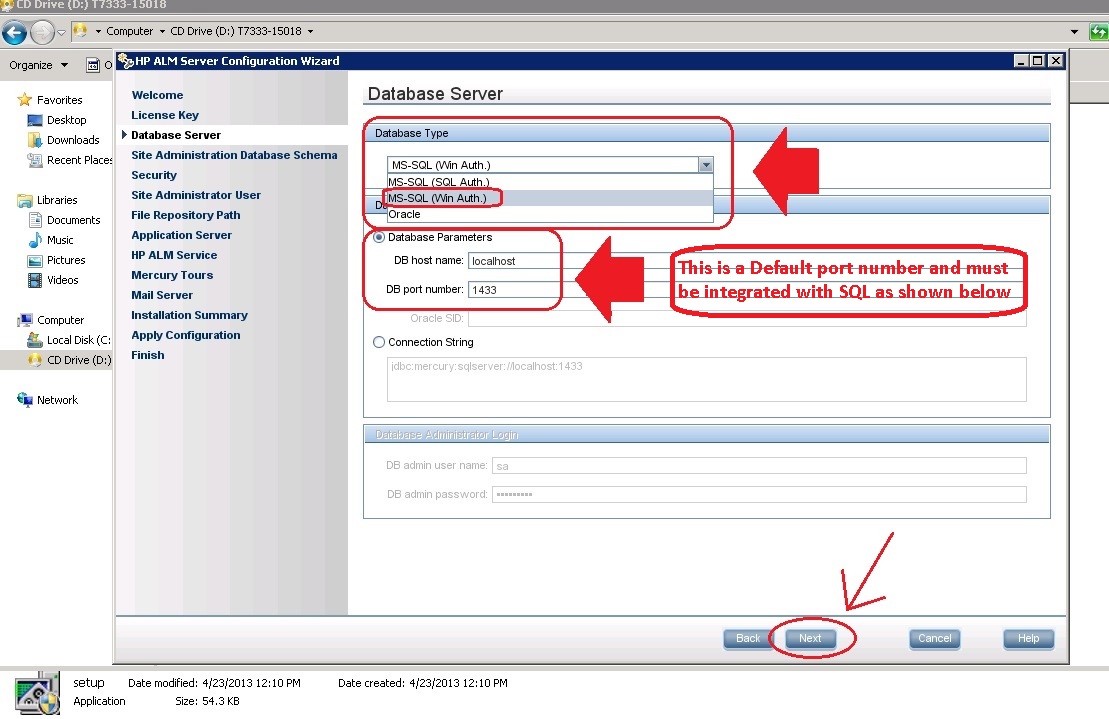
9.1 In Database Server- Database type can be (Windows as well as SQL Authentication)
9.2 In SQL Authentication Enter hostname (any), DB administrator login credentials (check the Hint below), port number 1433 is default and already written (Integrate port number 1433 with SQL Database)
9.3 In Windows Authentication Enter hostname, port number 1433 is default and already written (Integrate port number 1433 with SQL Database)
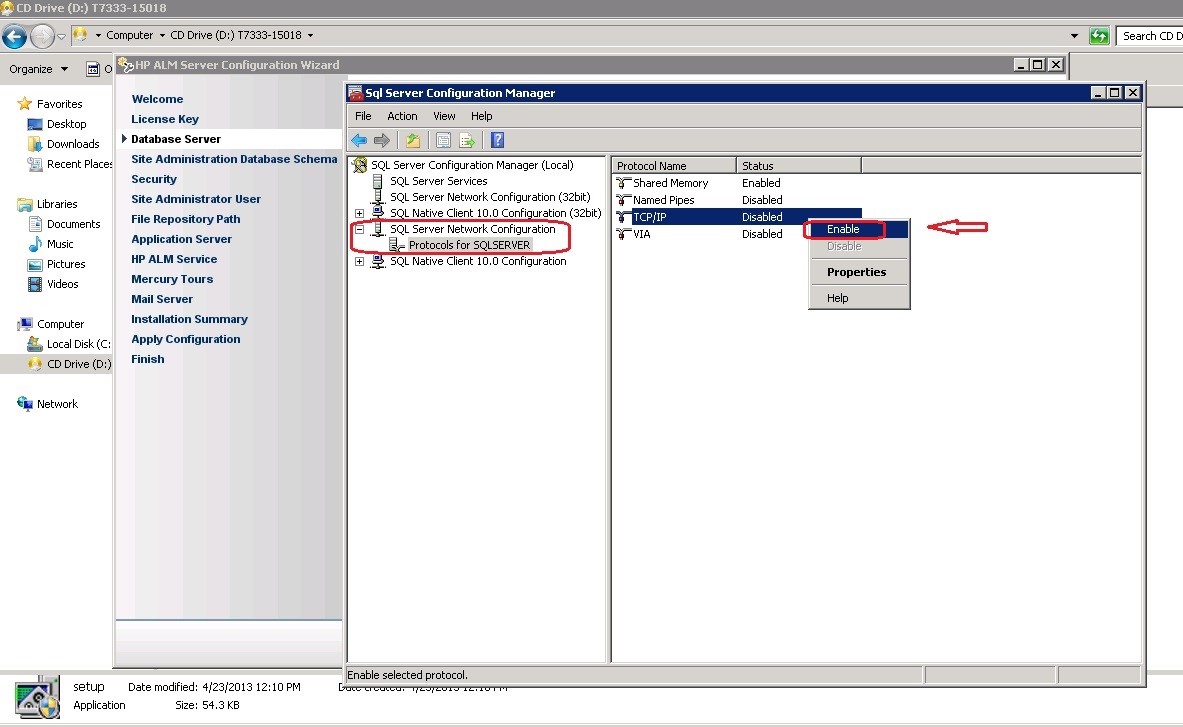
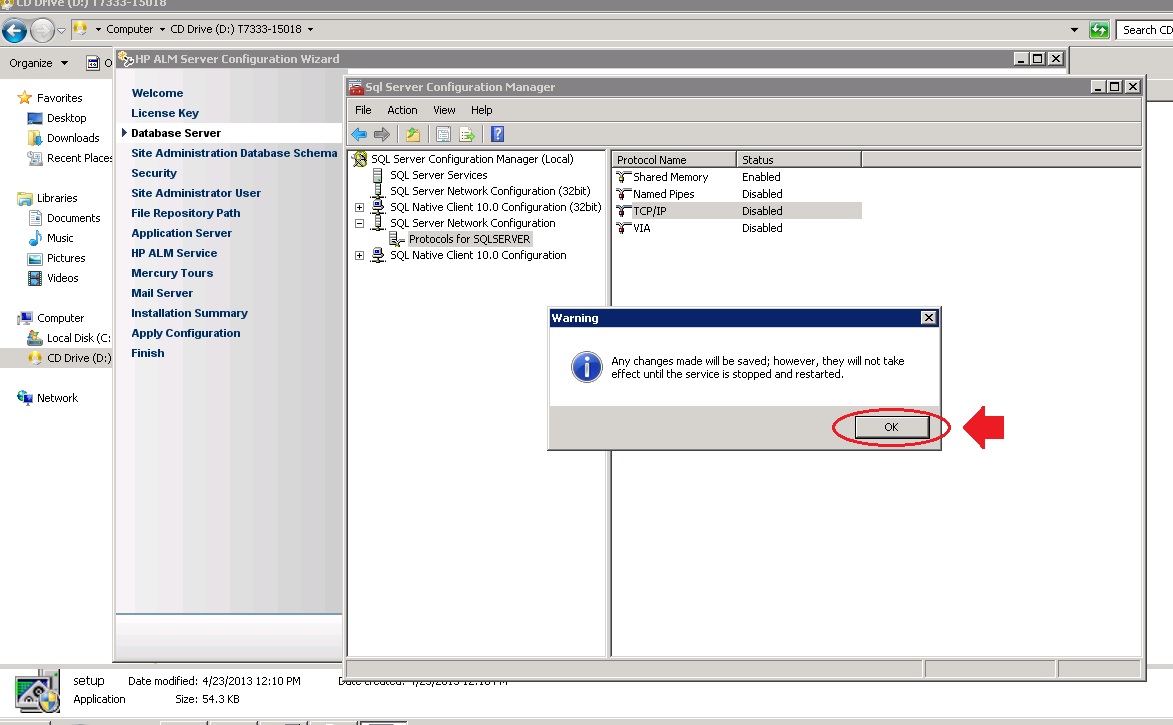
9.4 Steps to Integrate port number 1433 with SQL Database: Go to Start- CLICK “SQL Server Configuration Manager, On the Left hand side SELECT “Protocols for SQLSERVER” under SQL Server Network Configuration. Then in the right hand side you will see TCP/IP right click and ENABLE it
9.5 Then CLICK “Ok” to the Warning Window
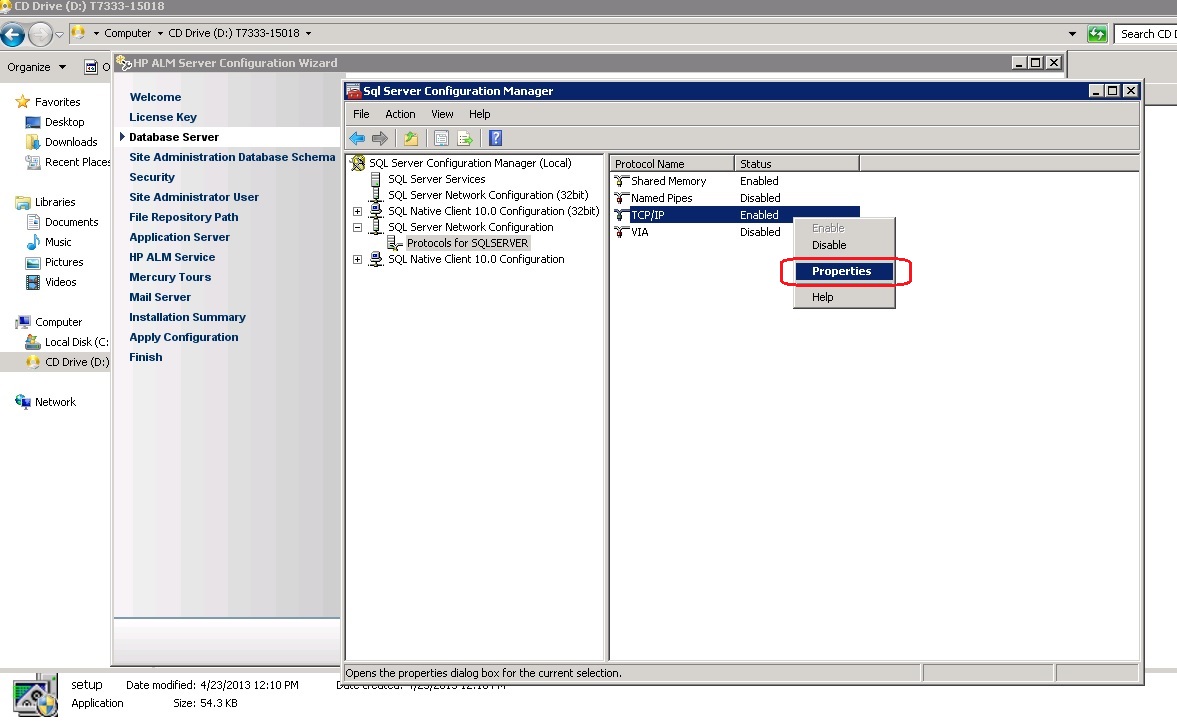
9.6 Again SELECT the TCP/IP and go to the properties option by right clicking it
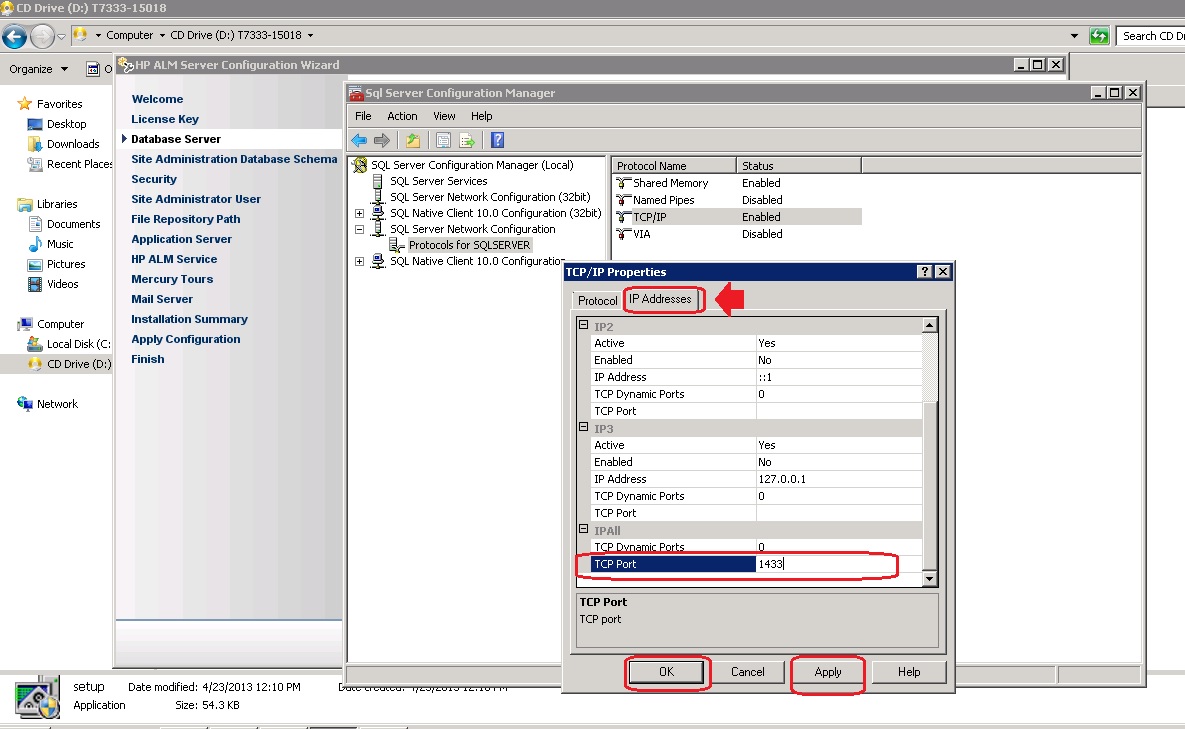
9.7 In IP Address tab scroll down and type the 1433 in TCP port under IPAll tab, apply settings and CLICK “ok”
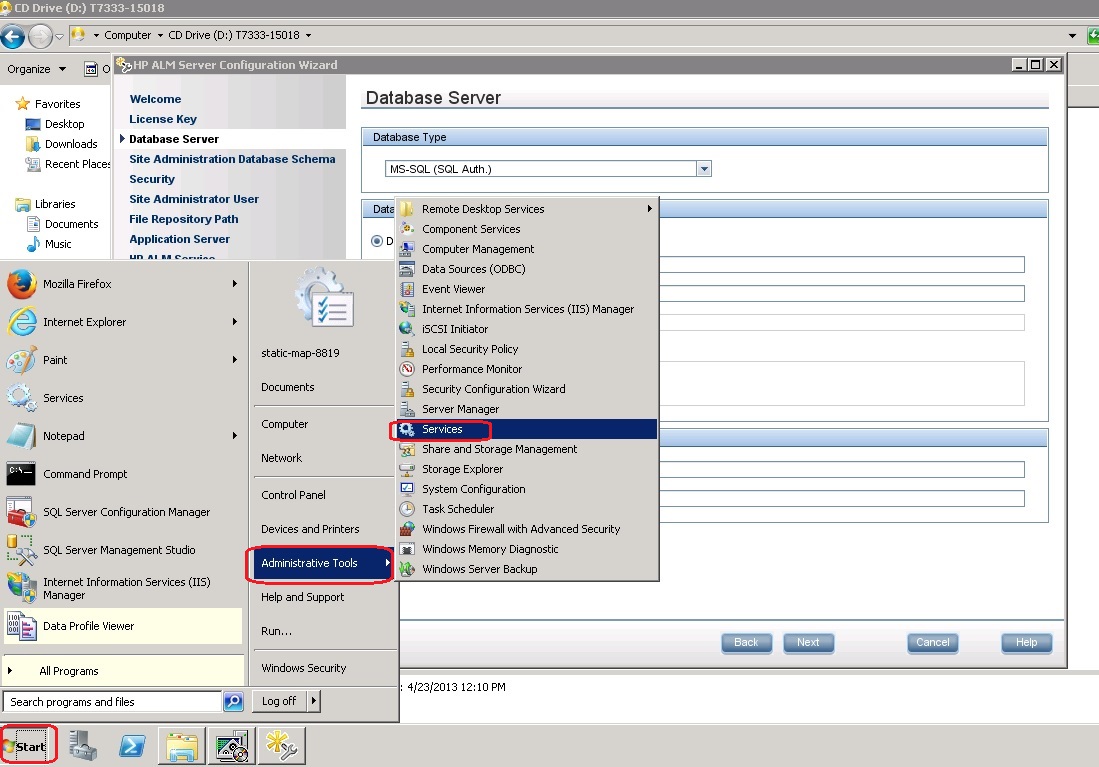
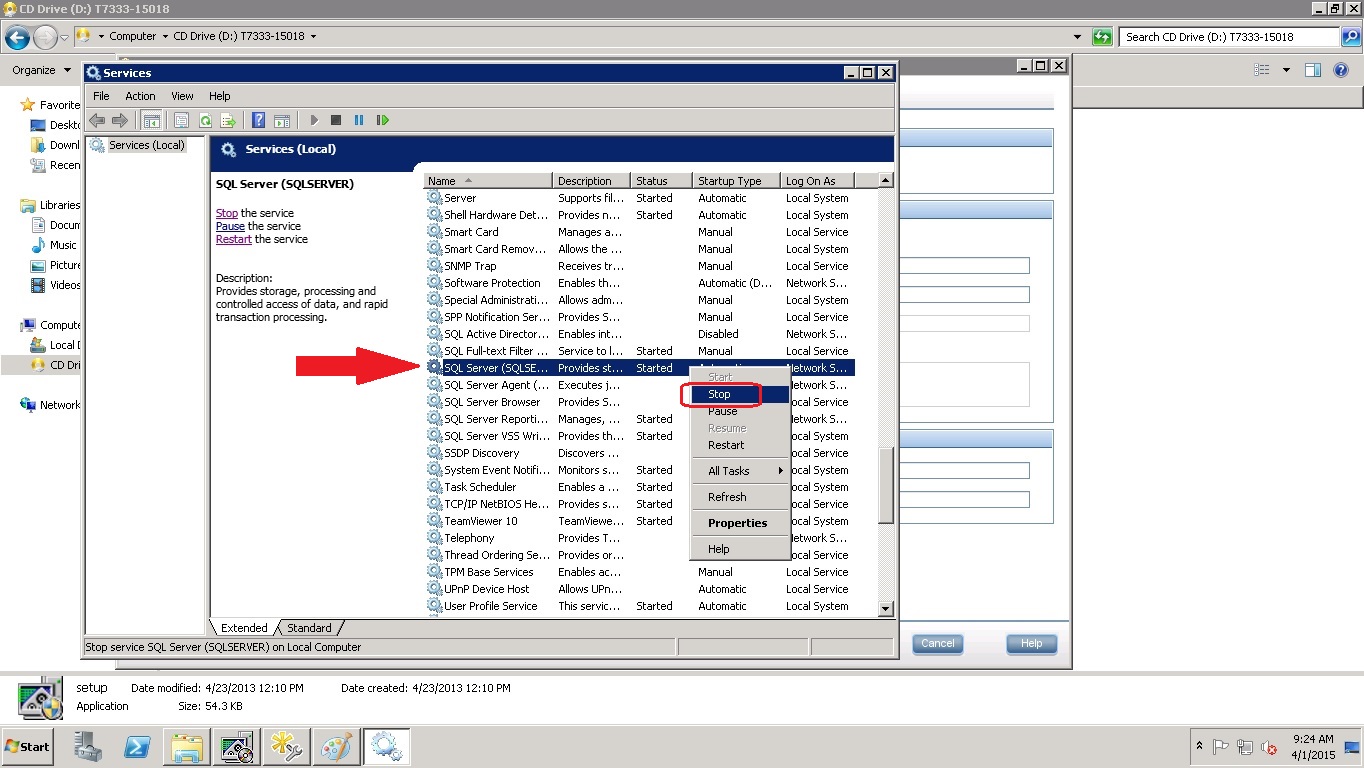
9.8 To successfully integrate SQL with the port number we have to Restart the SQL Services, So go to Start-Administrative Tools- Services-OK
9.9 Scroll down to SQL Server, Stop the service
9.10 Now Start the Service
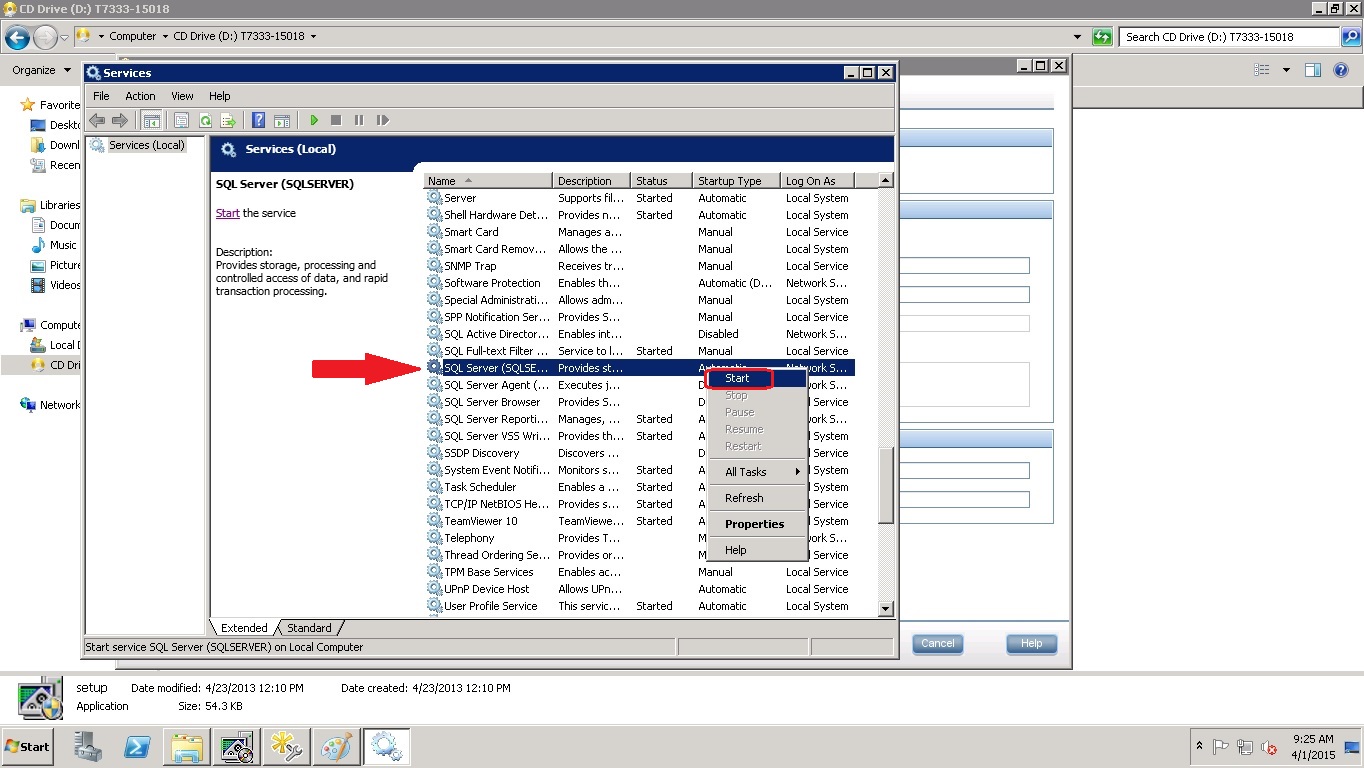
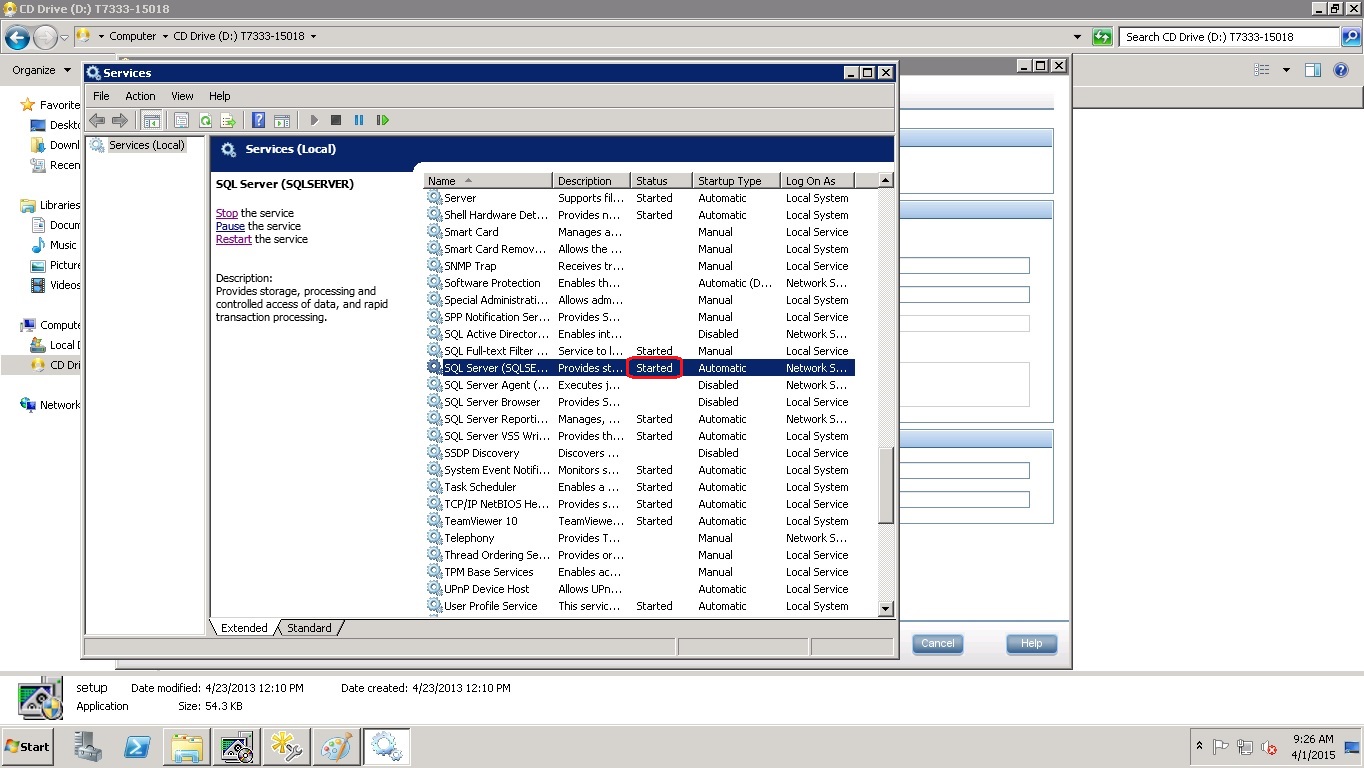
9.11 It is now Started and SQL is successfully integrated with HP ALM
10. Steps for further Configuration of HP ALM 11.52
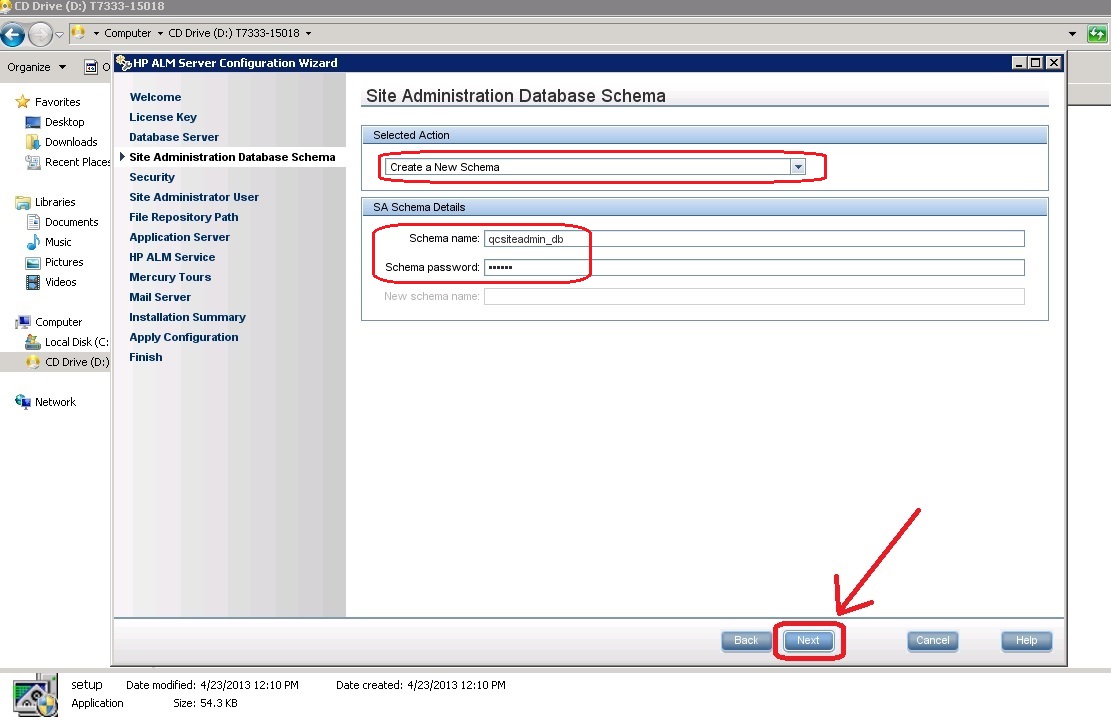
10.1 Enter the Site Admin Database Schema Name and password. After entering the details, CLICK“Next”
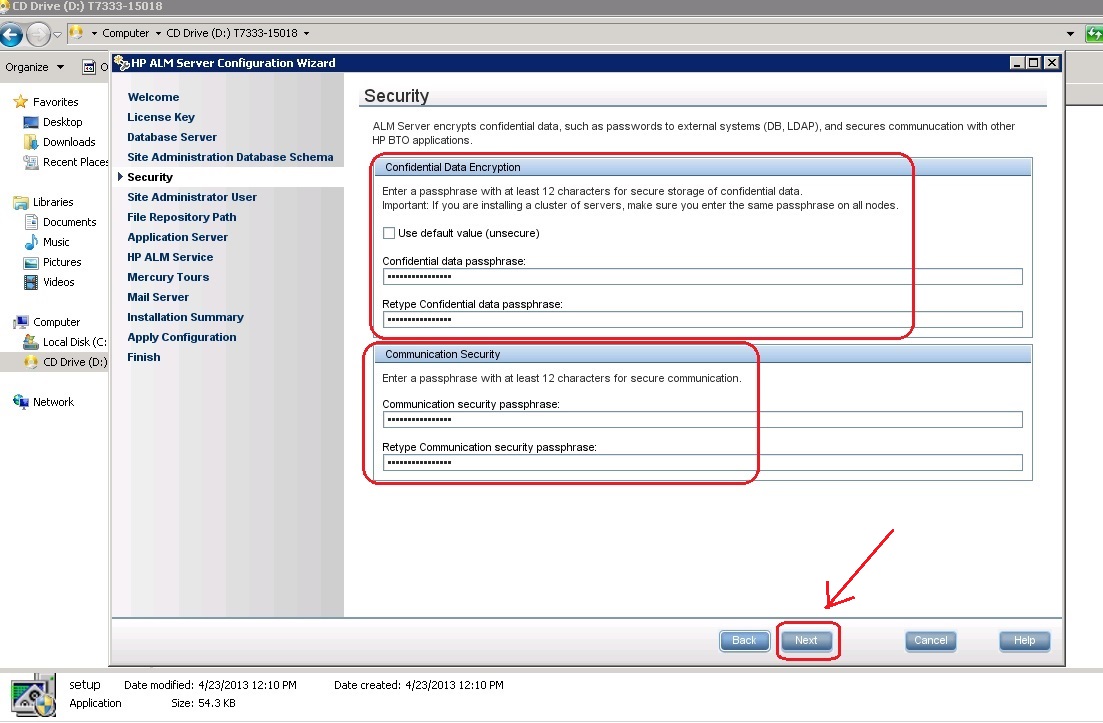
10.2 In Security Enter a strong paasphrase for secure storage of confidential data
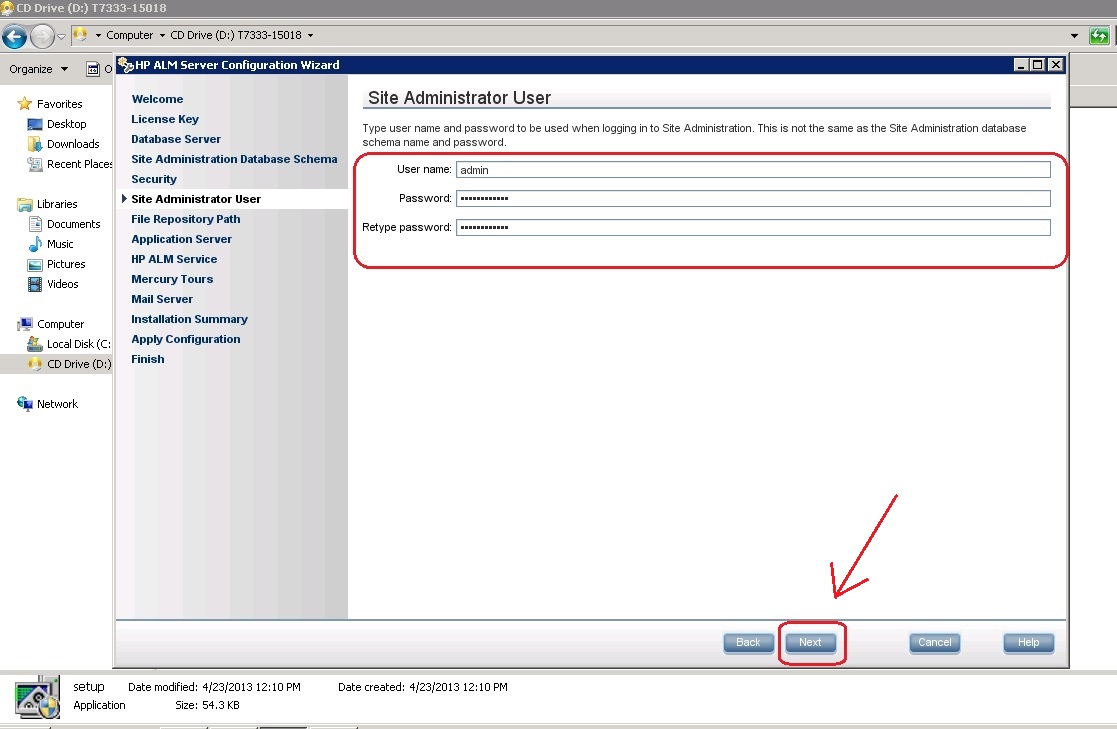
10.3 Type Username and password to be used when logging in to Site Administration
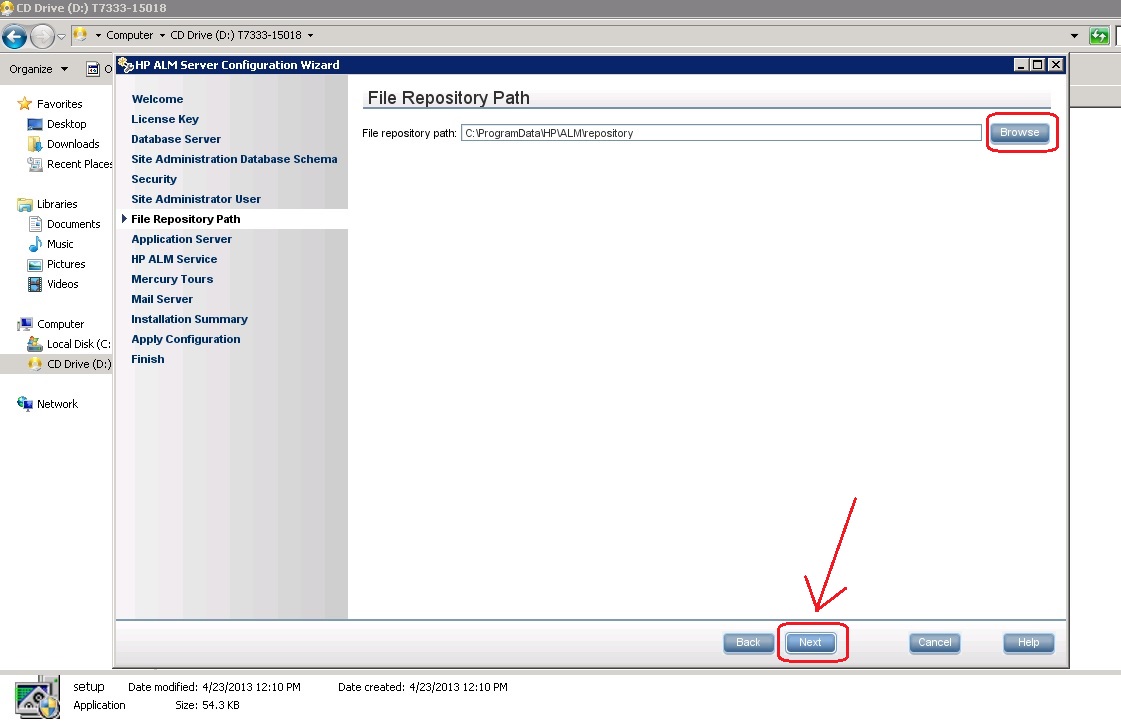
10.4 Do nothing for Default File Repository path otherwise SELECT “Browse” for changing the Default repository path and then CLICK “Next”
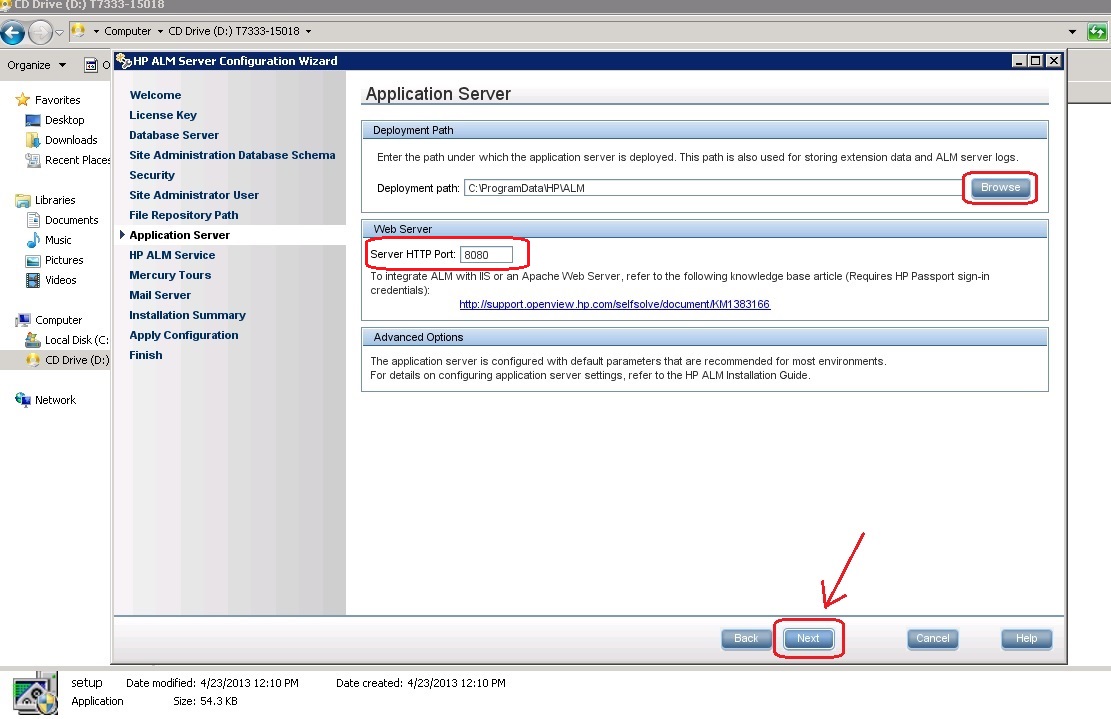
10.5 If you want to change the Deployment path of the Application Server CLICK “Browse” otherwise leave it as it is. Note: The Default Port 8080 might be used by other applications, hence it is better to choose other port numbers, after making your choice CLICK “Next
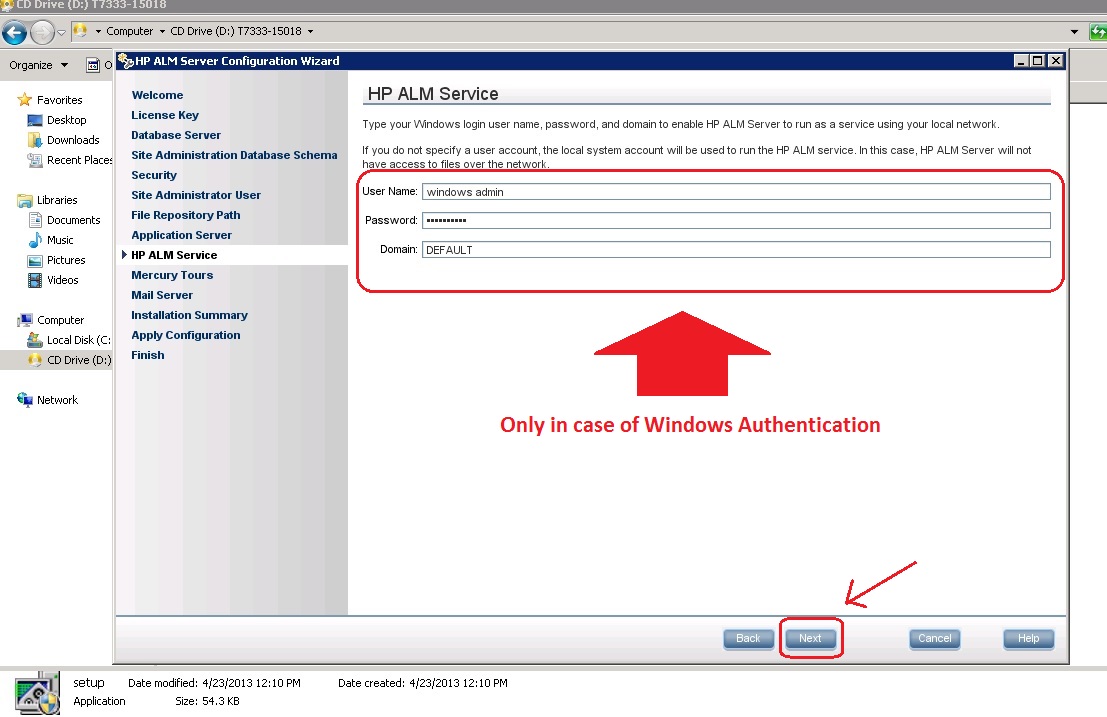
10.6 For choosing Database type as (Windows Authentication) in Database Server, you need to type your Windows login username, password and domain to enable HP ALM Server to Run as a service using your local network
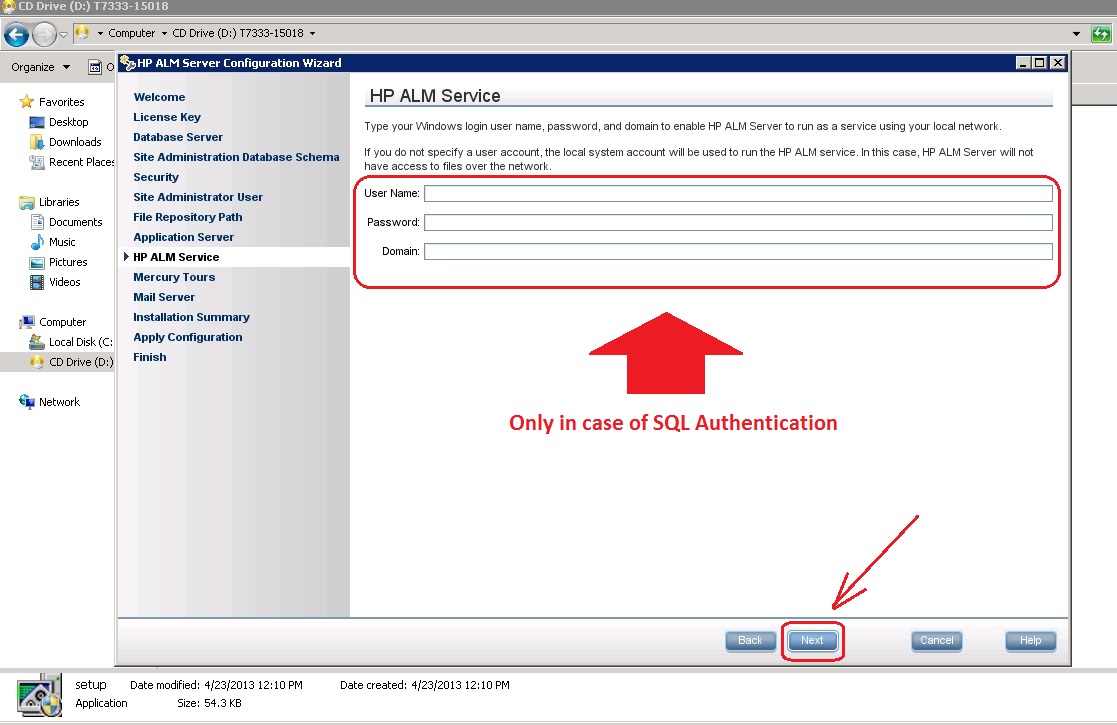
10.7 For choosing Database type as (SQL Authentication) in Database Server, Leave the HP ALM Service as empty as your Windows login credentials would be used by default. CLICK “Next” to continue
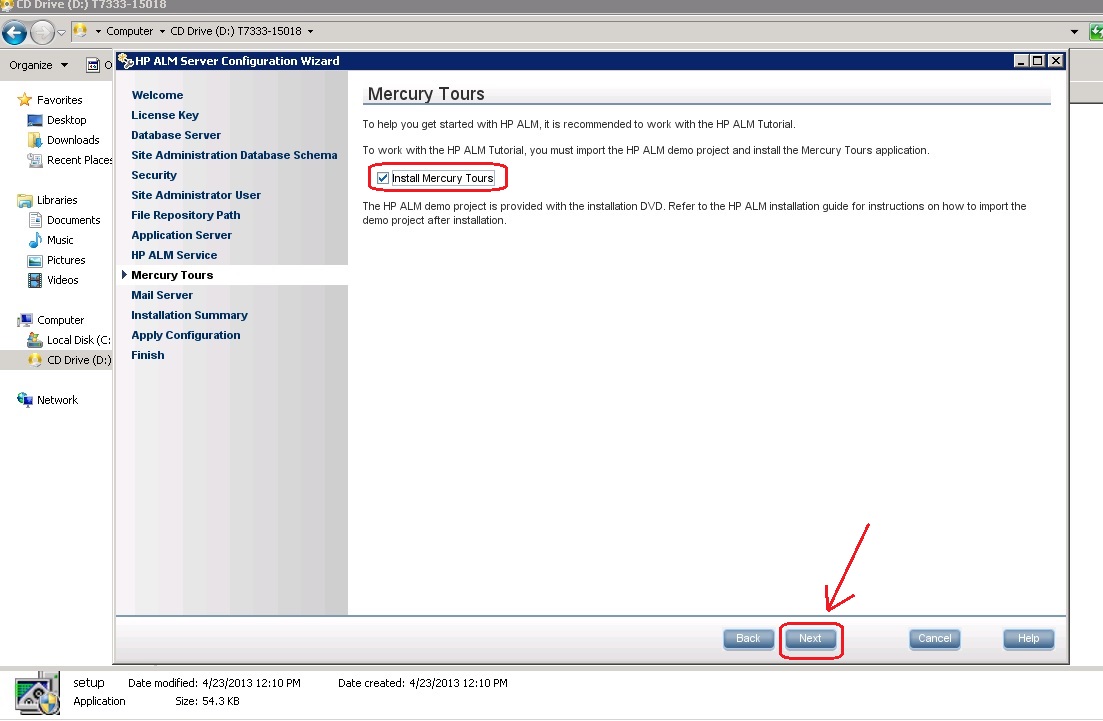
10.8 Check the install mercury tools check box to install the demo project and CLICK “Next”
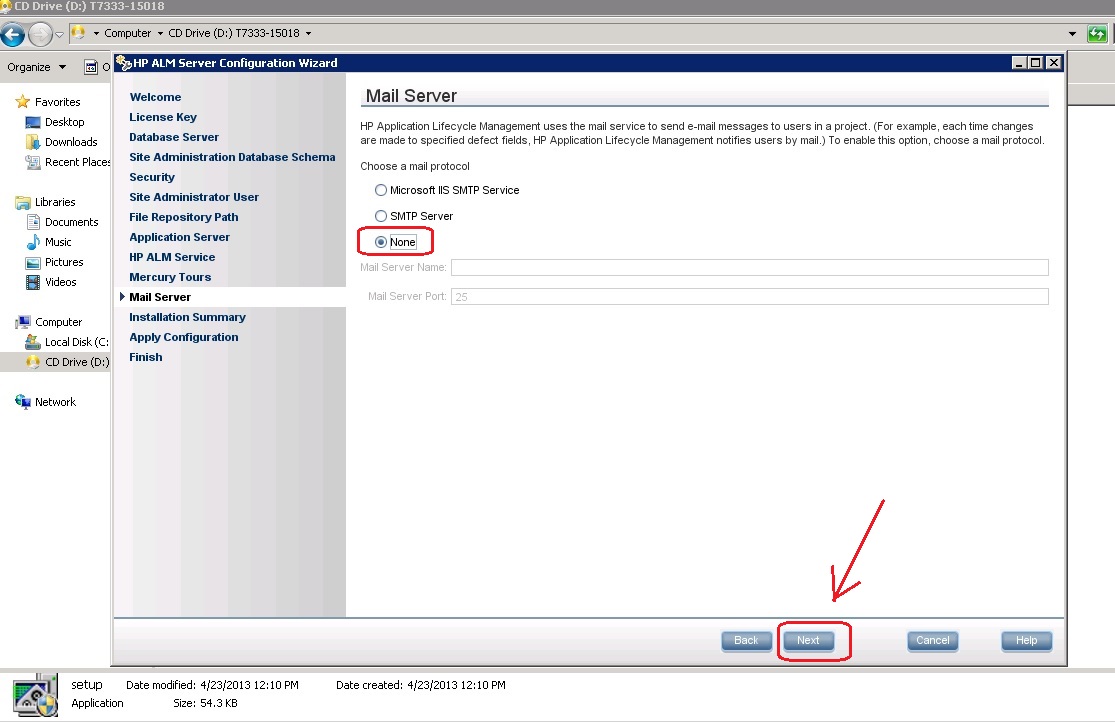
10.9 Enter the server details to setup mail server for HP ALM. This is used to send emails using ALM. If you do not want to specify, CLICK “None” and move ahead
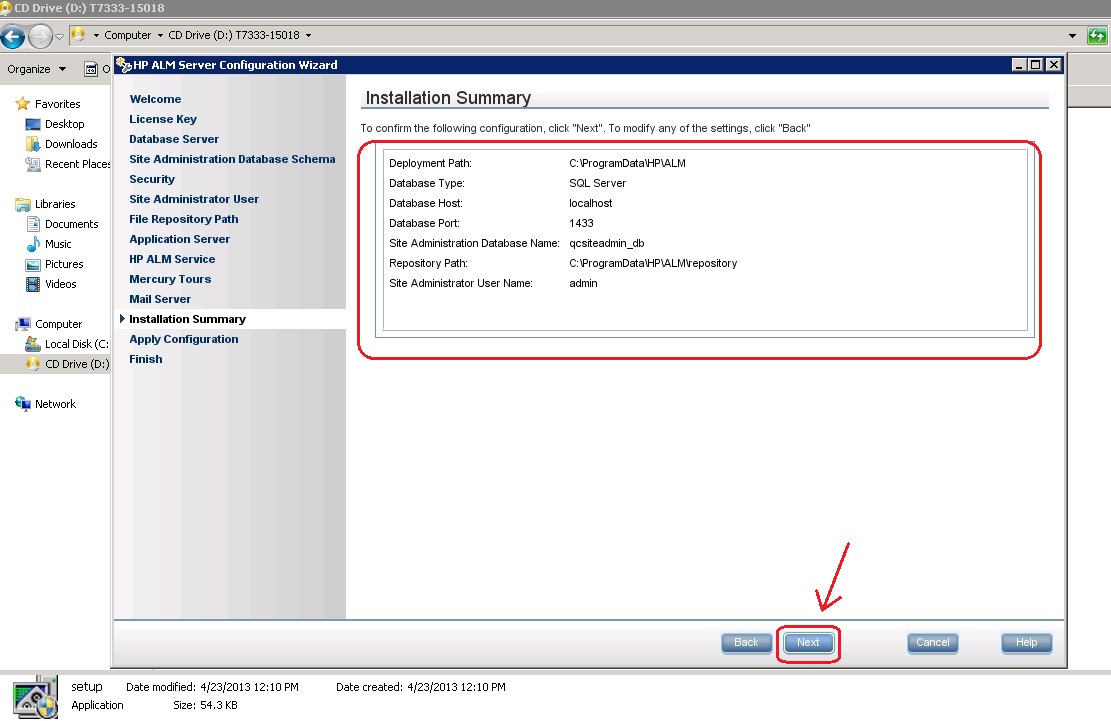
10.10 A configuration summary is shown before proceeding. CLICK “Next”
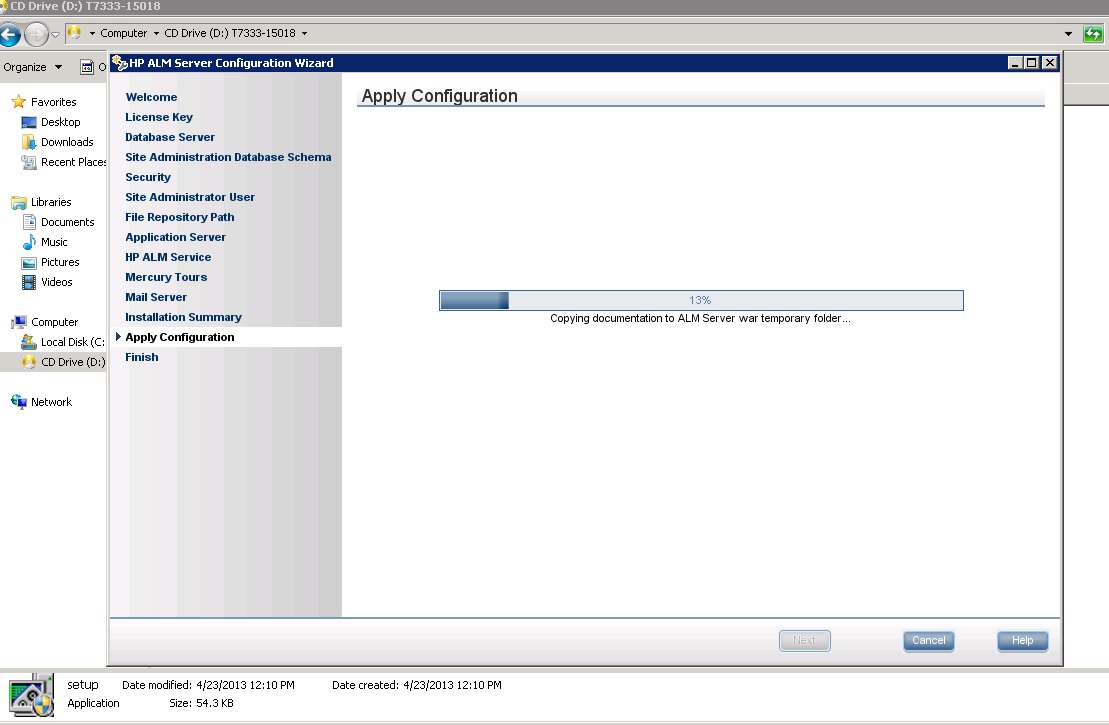
10.11 Configuration proceeds
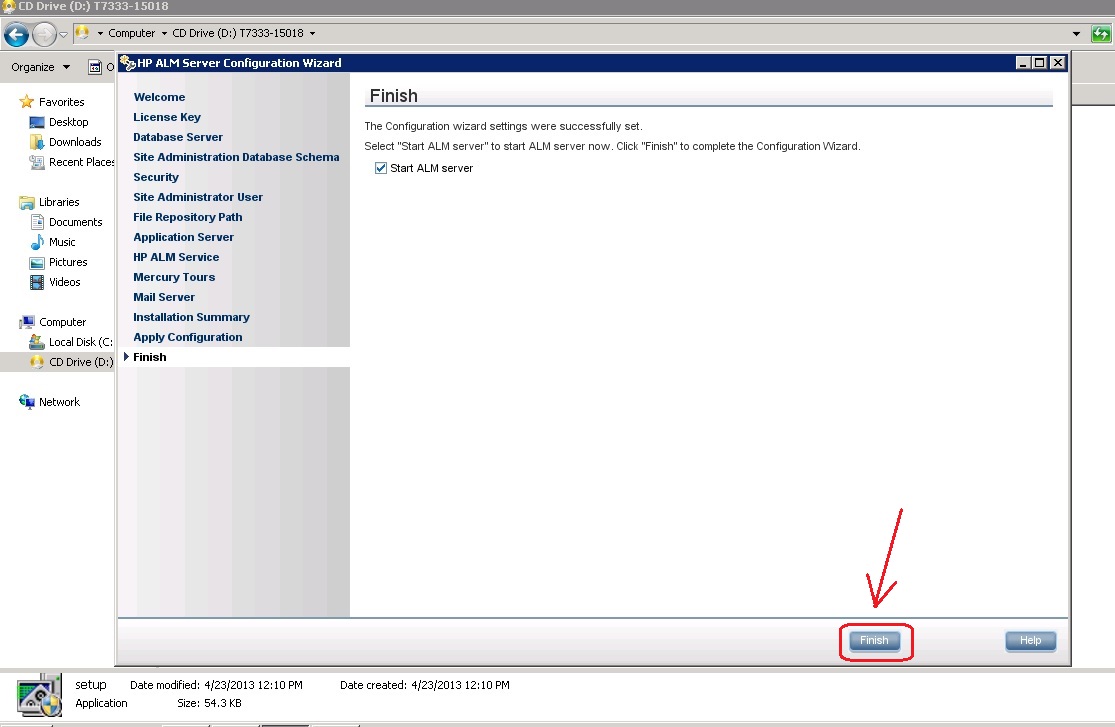
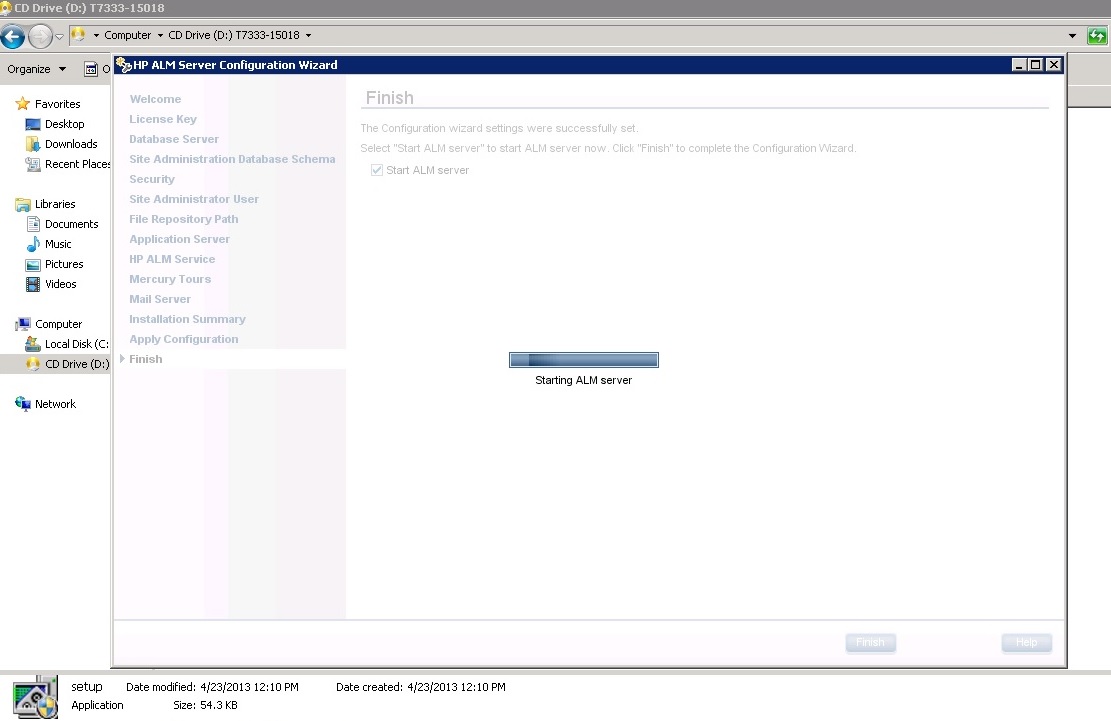
10.12 After applying the configuration, if successful, status message would be shown appropriately. Click ‘Finish’ and ALM service will be started if ‘Start ALM Server’ has been checked. CLICK “Finish”
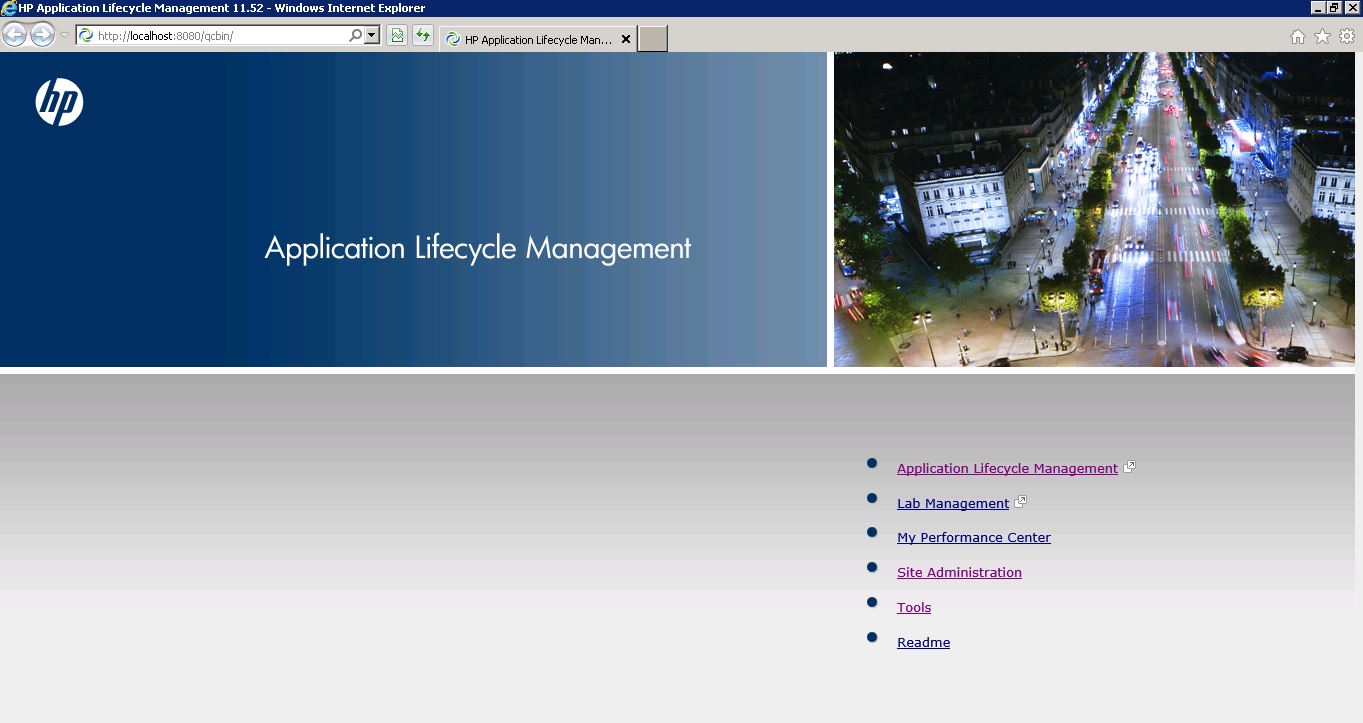
10.13 At the end of this installation the server is started and you can now start using ALM from a web browser by launching the client.
10.14 This is how the ALM browser looks like
Leave A Comment